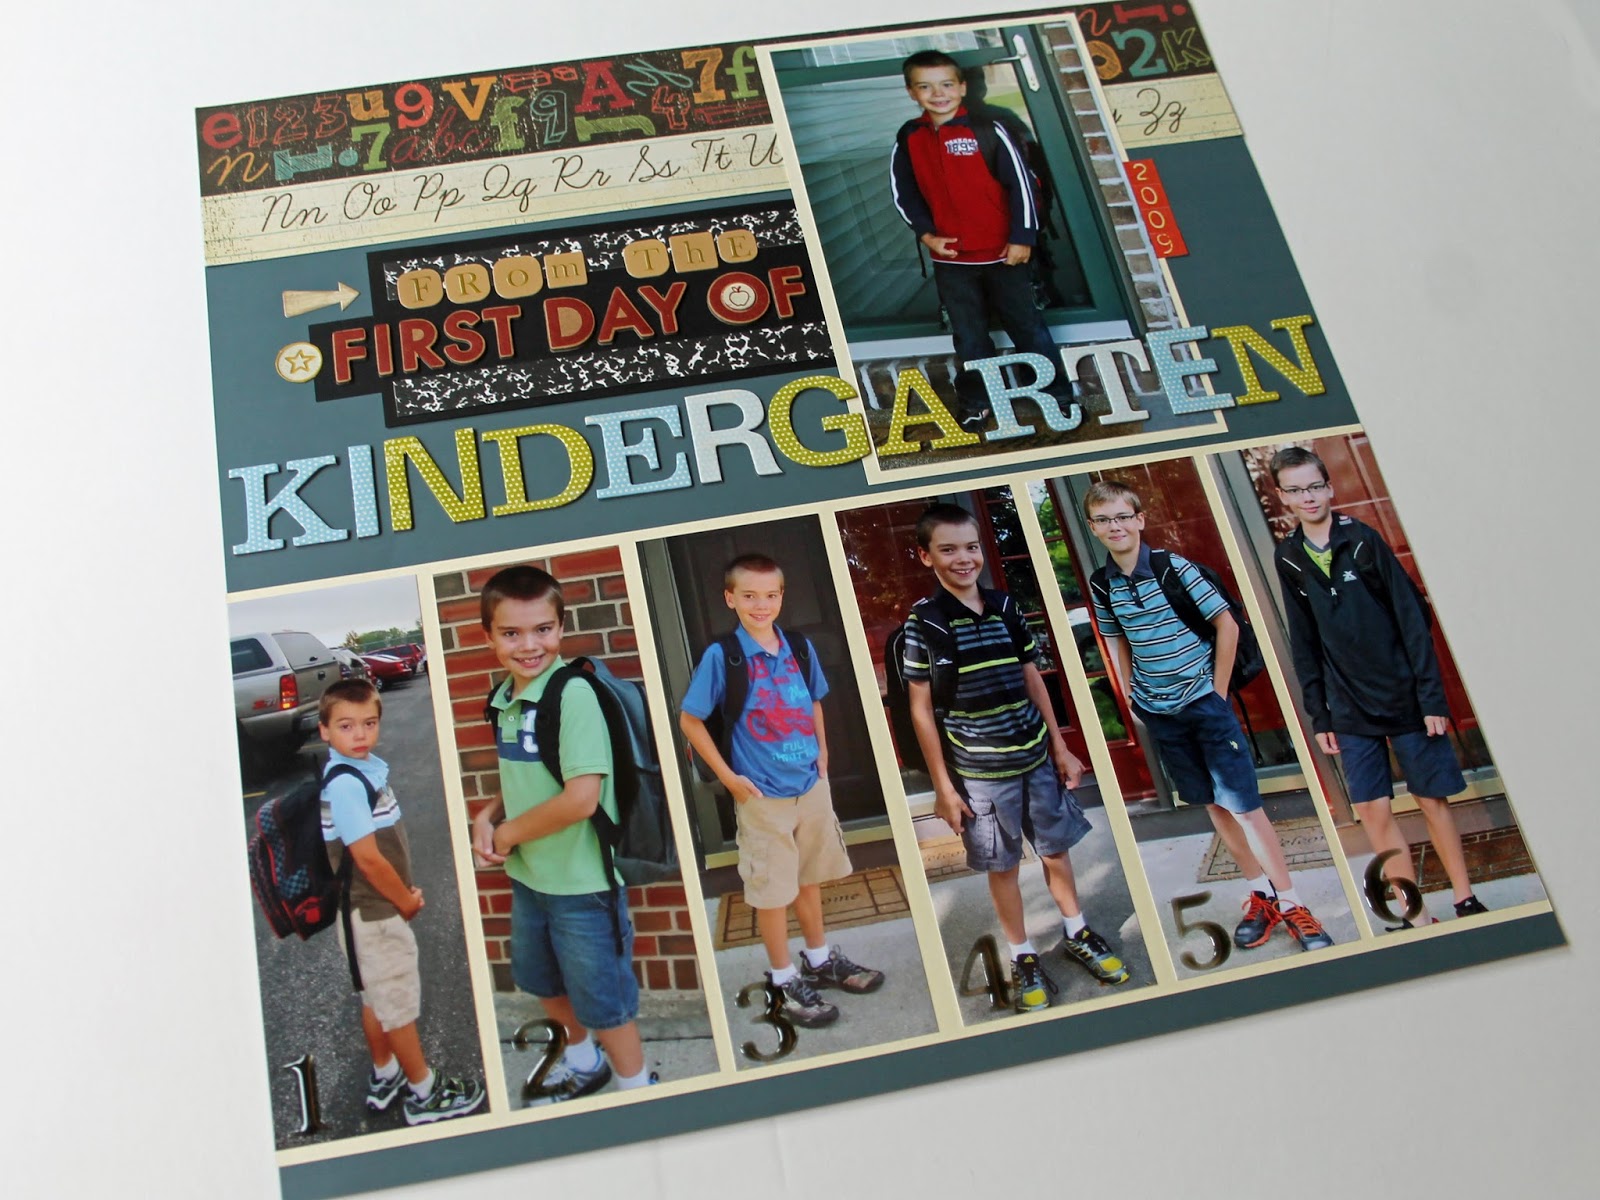
After completing the School Year Photos layout, I had fun idea for another collage type layout for my kids school years - a page for all of the first day of school photos. What began as an idea for just the first day of school photos turned into a First Day of School - Last Day of School 2-page layout, highlighting the first day of Kindergarten, and what will be the last day of High School.
Again I had to go back and collect all of the first day of school photos. Thank goodness for digital technology and computers - they were all basically at my fingertips - just a few clicks away!
After gathering the photos, I tried many variations of the layout before deciding on this one. My original idea was to have one long strip through the center of both pages with all of the school years, but I realized that 6 thin photos was the most I'd be able to squeeze in a 12x12, and I couldn't get the Kindergarten picture in. I considered just doing grades 1-12, but really wanted to keep the Kindergarten photo in. So I moved it to the top and realized I could balance it out on the other side with what will be a Last Day of High School photo. With that, the layout was set.

To accent the photos, I added a border across the top of both pages - different borders but from the same paper collection and same color scheme. I created the labels with a black piece of cardstock and various colors of chipboard letters. I really wanted the words "Kindergarten" and "Highschool" to stand out, so I used a larger chipboard for them, and placed them running over the photo (the H is not yet attached, I'll need to put the photo under in first.) To label the yearly photos, I added transparent gel numbers to each photo - they are noticeable but yet subtle enough to not distract from the photo.
It was so fun making this layout, even though it is a work in progress and not yet complete. Each year I'll just add one photo and 5 years from now it will be complete!
Thanks for looking and I hope you are inspired to make a few school year pages for your kids!
I recently started working on my kids school year albums again, and decided that I wanted to do a 2-page layout of their school photos. I've often seen those picture frames where you can add each year's photo into a collage, and so I wanted to do a scrapbook version of that.
The first step was gathering up all of the photos of the same size from each year, this proved to be the most time consuming part of the process. I had some of the photos in the right size, but searched through 4 photo boxes to find a straggler here and there. With 2 still missing, I asked my husband if he still had any old school photos of the kids at work, and he did! The last 2 were found.
From here I laid them out in various arrangements to see how the years would best be grouped or sequenced. I knew I wanted to add a large graduation photo as well, so I made that the highlight of the second page and arranged the small photos around it, with the 4 high school year photos above the graduation photo.
This layout was really quite simple - I chose a subtle pattern paper for the background of the collage page, and mounted each school photo on grey cardstock. I needed one filler square in which I added a journaling card with a nice quote on it.
The Graduation embellishments came mostly from the Echo Park Grad kit, and one other graduation sticker sheer I had on hand. To add each grade, I printed out the numbers in a font that I liked, and punched them out with a 1/2" circle punch. And that was it! Here is the final layout.
I'm happy to have this done, and I had the pleasure of making 2 of these, one for each of my boys albums. Now, all I have to do each year is add the photo. So easy.
After finished up these layouts, I came up with another school year layout which I am really excited to share tomorrow!
Yesterday I began working on a few photos from a quick road trip my son and I took in August to see the total solar eclipse. We drove to St. Louis, stayed overnight, and saw the eclipse the next day. I had chosen to use the Simple Stories 24/7 collection for these photos since I liked the look of it and color scheme, and it was a set of supplies I had on hand! One of the sheets included in the pack was a pre-printed photo collage. This page was perfect for a cover and ended up being one of the quickest and easiest covers I've made. Since the page already had the frames and inset patterns, all I really needed to do was add a few photos, a couple of tags, and label them.
I chose one small photo for each of the places we visited, one additional photo of my son and I, and decided to use two frames for labeling our trip. I trimmed down the photos to fit and added some lined paper to one of the frames to add the journaling.
Although the purpose of this trip was to see the eclipse, we stopped at several other places along the way, so I wanted to be sure to include those as well. But the highlight really was the eclipse.
There were a few frames in which I didn't really like the graphic that was there, so I covered it with a cut-down journaling card or sticker over the top.
This layout took about 15 minutes and was really fun to make. I loved the clean and simple look of this page, and the idea of this mosaic-grid-collage style page inspired me to try to incorporate this look into the entire album.
Here is the final layout:
Thanks so much for looking!