Yesterday I began working on a few photos from a quick road trip my son and I took in August to see the total solar eclipse. We drove to St. Louis, stayed overnight, and saw the eclipse the next day. I had chosen to use the Simple Stories 24/7 collection for these photos since I liked the look of it and color scheme, and it was a set of supplies I had on hand! One of the sheets included in the pack was a pre-printed photo collage. This page was perfect for a cover and ended up being one of the quickest and easiest covers I've made. Since the page already had the frames and inset patterns, all I really needed to do was add a few photos, a couple of tags, and label them.
I chose one small photo for each of the places we visited, one additional photo of my son and I, and decided to use two frames for labeling our trip. I trimmed down the photos to fit and added some lined paper to one of the frames to add the journaling.
Although the purpose of this trip was to see the eclipse, we stopped at several other places along the way, so I wanted to be sure to include those as well. But the highlight really was the eclipse.
There were a few frames in which I didn't really like the graphic that was there, so I covered it with a cut-down journaling card or sticker over the top.
This layout took about 15 minutes and was really fun to make. I loved the clean and simple look of this page, and the idea of this mosaic-grid-collage style page inspired me to try to incorporate this look into the entire album.
Here is the final layout:
Thanks so much for looking!
It's not too often that I "scraplift" another persons scrapbook layout or design and use it for my own. But when I came across a layout on Pinterest, I knew I needed to use it for a cover page for one of my books and decided to use it for our Custer State Park trip in South Dakota. Since the original layout was 2 pages, I modified it down to one and adapted it to fit my photos and timeline. What I ended up with is probably one of my favorite pages that I've ever made.
This page was really so simple to make and took very little in terms of supplies or paper. I typed up and printed out a small itinerary of our 3 days in Custer, and highlighted each day with one photo from that day. I chose 2 patterned papers and ran one piece across the top, and a narrow piece along the bottom.
I created the header banner with some cardstock and stickers, and a couple of tags that I had from the park that came off some clothing we purchased (I could have just printed out logos if I wouldn't have had these.) To add some details, I double-mounted each of the papers in the header, and added a couple of arrows from some punches that I have. The metal location brads and compass were added above each of the days of the itinerary, and add some nice texture, color, and interest to the page.
Our trip to Custer State Park was one of the best things we did in South Dakota, and I'm thrilled with how this cover page turned out. The papers are from the We R Memory Keepers Shine collection, which I used for all of our South Dakota albums.
Thanks for looking!
Sometimes one good idea leads to another. And then another. And pretty soon you have so many ideas that you don't know what to do with them all.
After working on the cover pages from our DC trip last week, I had several more ideas for new designs for cover pages, so I jumped in and started working on our South Dakota trip. I've really been trying to think of different ways to make cover pages for these travel albums, so for this one I wanted to create a "table of contents" in a sense, because there will be a lot of different places covered in this album.
I had picked up a South Dakota postcard while we were out there that I knew I wanted to use, and I had already chosen the paper and embellishments that I was going to use for this album. I really loved the We R Memory Keepers Shine collection and had already purchased it several months ago to use for this trip. Even though I didn't know what my photos would look like, I thought the Shine collection had the right feel...kind of natural/rustic/western without being totally in-your-face about it.
I again had to find a map online that I liked, and with the map chosen, the postcard, and the idea for the table on contents (destinations list) I was set to go.
This layout took me a little longer than I expected, partially because I needed to go through all of my folders of photos on my computer and make sure I didn't miss anything that I would later want added to the table of contents. Once I wrote out that list, there was no changing it. With the table of contents was set, I knew what layouts would be following the cover page and in what order, and I could put it all together.
For the actual table of contents, I used 3 journaling cards stacked on top of each other. These cards had open slots to write in so they worked perfectly, but you could create the same effect with plain colored cardstock tags applied on a patterned paper. I also thought it would be fun to add the locations to the map with a numbering system for a visual of where we went.
And here is the final layout:
After completing the other Washington DC cover page with the map the other day, I started working on the cover page for the second album which will be an itinerary page.
I decided to keep this page really simple, and just created a chart in Word with the attractions we saw each day. I tried to keep it to the main attractions - things I will be doing layouts for in the book, even though there were other smaller things we saw each day. I usually add some sort of photo on my cover pages, so this time I thought I'd try it without and just keep it simple and clean.
I added a journaling card for a bit of decoration, and added the DC punch-out card at the bottom to over up some other words that were printed on the background paper that I didn't want to be visible. I mounted the itinerary on a piece of tan cardstock to match the journaling card, and added a few grey photo corners that I made from an arrow punch.
After typing up and printing out the chart, this page only took me about 15 minutes to put together. It's simple, but it works.
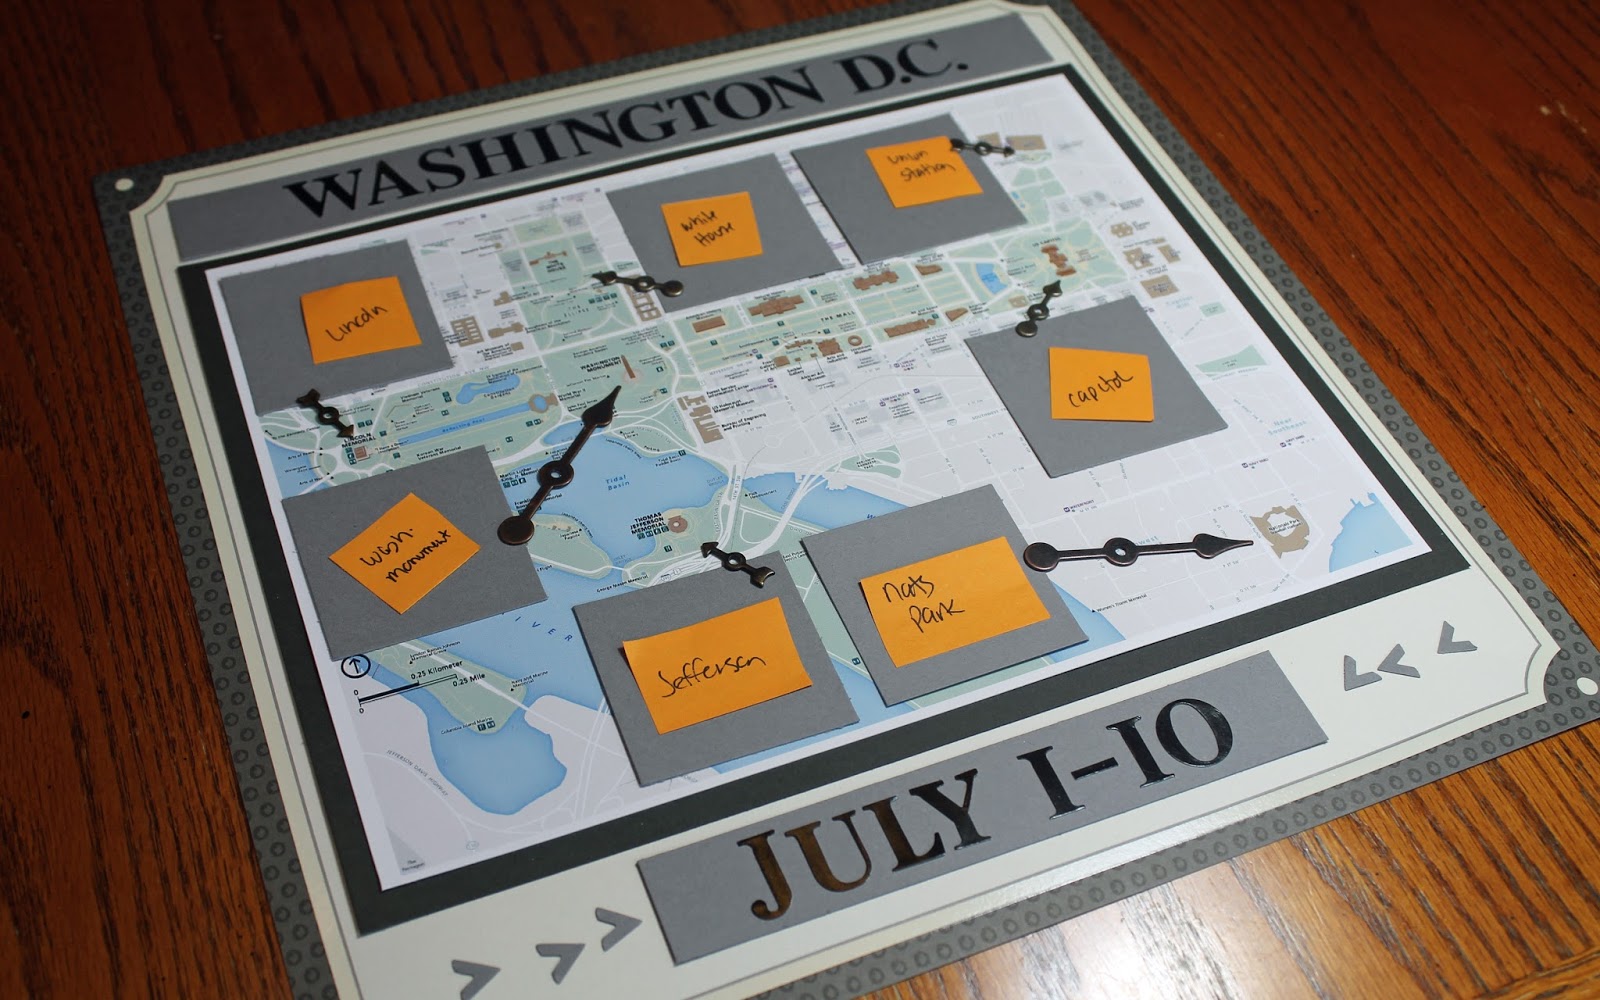
I'm finally getting back into the groove a bit and have started working on a cover page for one of the next albums I'll work on. In July we took a vacation to Washington D.C., so I've been thinking about how I would do album cover pages for this trip. There will be 2 albums for this trip, so this is the cover page for one of them.
I've used maps quite a bit before in travel albums, but this time I wanted to try to highlight the map with a few of the places we visited. There was no way to do this for all of the places we went during that trip, so I'm planning to do more of an itinerary style layout for the second album, and keep this one more simple with just the map and some highlights.
 I was able to find a map that I liked the look of online, and resized and printed it out at home. I then had to decide how many places I would highlight, and how to highlight them. I thought a small, thumbnail image of a few of the places would look nice, so picked a few of the main attractions and decided to highlight those. I chose, resized, and printed out 7 of my photos to use on the cover. I also created a header and footer banners (with grey cardstock and stickers) with just the words "WASHINGTON D.C." and our travel dates to finish it out.
Then it was time to put it all together. I chose a piece of 12x12 paper that had an interesting border around the edge, and I cut some darker grey cardtock to mount the map and the thumbnail photos on. I then took all of these pieces and placed them all on the background paper, and shuffled and moved things around until I liked the look of it. I also had some metal arrow brads that could be used to point to places on the map from each photo.
This layout came together really quickly and even though I switched around the thumbnail photos a bunch of times and thought I might have space to add a few more, I decided to keep it as it was and not clutter it up with more. Here is the final layout:
I'm quite happy with how it turned out, and the color scheme and clean lines are something I hope to carry on to the rest of the layouts in this album. Now I just need to to edit and order the photos from this trip so I can get started!
I finished up the last 2 sports cover pages this weekend. I'm kind of working ahead here, and making cover pages with placeholders for future photos. It's kind of risky, as no one knows for sure what the future will hold, so I'm going out on a limb here and assuming that my son will continue to play these sports for the next few seasons. He's a bit of a sports fanatic so I think I'm pretty safe.
I started a new baseball album with photos from 2015 and forward since the other album is completely full. Since I already had the 2015 layouts completed, I just needed a cover page for the album.
For this layout I just used the back side of the first layout in the book, which happened to be a double-sided sheet with the black and white baseball words on it. I mounted a red 8x11 sheet in the center, and cut 5 black pieces to mat the photos on. I was able to download and print out the baseball league's logo and add that to the design. I added a baseball themed card to balance out the geometric layout, and used an arrow punch to make the white arrows.
Since I tend to make about 10 pages per season for baseball, I'm again assuming that I'll be able to get 4 seasons worth in this one album - or about 40 pages. That seems to be about the maximum number of pages I can comfortably get into a ring-bound album, so I'm going with it.
I also created the cover for the next soccer album. This album should hold 2 years worth of soccer (4 seasons with spring and fall, plus a few pages of indoor), so I've set up the cover page to have his current team and season, as well as his next years team and season.
This layout was again pretty simple - I double mounted the photo squares and added a few strips of soccer paper. I printed out the header banner with the logos, and added a row of soccer word stickers along the middle and bottom of the page. I had these large soccer brads that I had found on clearance at a local store, and thought they'd make a nice touch to the banners.
If feels good to "work ahead" a bit and have these pages done. I don't know why I never did cover pages for these albums before, I guess the albums were always a work-in-progress with new layouts being added each season. I never thought to do covers for them since they were always changing. With the albums now more permanent, all I need to do each year is add the layouts for that season and put a small photo on the cover page. This should make it easier to stay caught up!
After finishing the Baseball Cover Page yesterday, I moved on to the cover page for the Soccer album. This album has a lot of seasons of soccer in it (we have a split season so we have spring and fall, plus a camp and an indoor season), and I wasn't sure how to go about making a timeline for this - I knew I wasn't going to be able to make it all fit on a traditional timeline across the page.
I did like using journaling cards to hold a small photo of each season like I used in the Baseball Cover Page, so I used that technique again here - just with a few more cards.
I added a strip of patterned paper along the top and bottom of the page, and a small piece behind the center journaling card as an accent. But really there is so much pattern and design in the journaling cards that I didn't need or want to add much more to the page. I was able to download a logo from our soccer organization's website and print that out as well to add in the center. And that was it! Just two more sports cover page to go and I'll be caught up - and I'm working on them already since I feel like I'm on a bit of a roll!