Sometimes one good idea leads to another. And then another. And pretty soon you have so many ideas that you don't know what to do with them all.
After working on the cover pages from our DC trip last week, I had several more ideas for new designs for cover pages, so I jumped in and started working on our South Dakota trip. I've really been trying to think of different ways to make cover pages for these travel albums, so for this one I wanted to create a "table of contents" in a sense, because there will be a lot of different places covered in this album.
I had picked up a South Dakota postcard while we were out there that I knew I wanted to use, and I had already chosen the paper and embellishments that I was going to use for this album. I really loved the We R Memory Keepers Shine collection and had already purchased it several months ago to use for this trip. Even though I didn't know what my photos would look like, I thought the Shine collection had the right feel...kind of natural/rustic/western without being totally in-your-face about it.
I again had to find a map online that I liked, and with the map chosen, the postcard, and the idea for the table on contents (destinations list) I was set to go.
This layout took me a little longer than I expected, partially because I needed to go through all of my folders of photos on my computer and make sure I didn't miss anything that I would later want added to the table of contents. Once I wrote out that list, there was no changing it. With the table of contents was set, I knew what layouts would be following the cover page and in what order, and I could put it all together.
For the actual table of contents, I used 3 journaling cards stacked on top of each other. These cards had open slots to write in so they worked perfectly, but you could create the same effect with plain colored cardstock tags applied on a patterned paper. I also thought it would be fun to add the locations to the map with a numbering system for a visual of where we went.
And here is the final layout:
Sometimes scrapbooking can take a lot of work. And it can be tedious sometimes. And once in a while it can feel like another thing you "have to" get done. But there are a lot of fun parts to. Looking for supplies can be fun, buying stuff is definitely fun. And usually, most of the work involved in actually creating something is pretty fun to.
Today I have everything I need to get started on my next project. The albums arrived today, the 597 photos arrived 3 days ago. I've chosen the papers and embellishments, and stocked up on cardstock and adhesive. Today I spread it all out on the table, take a step back, and look at this pile of random stuff that I will turn into something meaningful. For me, this is the fun part.
Maybe it's just the anticipation, or maybe it's the idea of taking all of this stuff and working with it and manipulating it to have it become something else.
In reality, it's just paper and stickers and photos and tags. But maybe it's more than that. Or at least it will be. In a few days or a few weeks, it'll be something more. It'll be all that's left of our trip and all that's left of that time we spent together. It'll be our memories, our laughter, and sometimes our fears. It'll be our "I can't believe we did that" moments and our "do you remember when..." moments.
And it'll always be there, to look back at and talk about. Years from now when some of our memories have faded and the details of these moments have been replaced by those that have followed, we can pull it off the shelf and remember again.
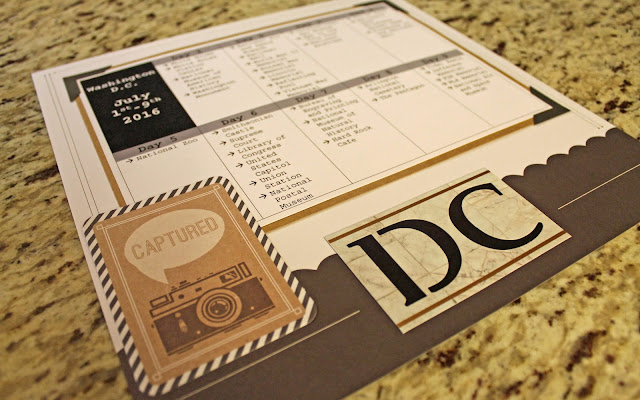
After completing the other Washington DC cover page with the map the other day, I started working on the cover page for the second album which will be an itinerary page.
I decided to keep this page really simple, and just created a chart in Word with the attractions we saw each day. I tried to keep it to the main attractions - things I will be doing layouts for in the book, even though there were other smaller things we saw each day. I usually add some sort of photo on my cover pages, so this time I thought I'd try it without and just keep it simple and clean.
I added a journaling card for a bit of decoration, and added the DC punch-out card at the bottom to over up some other words that were printed on the background paper that I didn't want to be visible. I mounted the itinerary on a piece of tan cardstock to match the journaling card, and added a few grey photo corners that I made from an arrow punch.
After typing up and printing out the chart, this page only took me about 15 minutes to put together. It's simple, but it works.
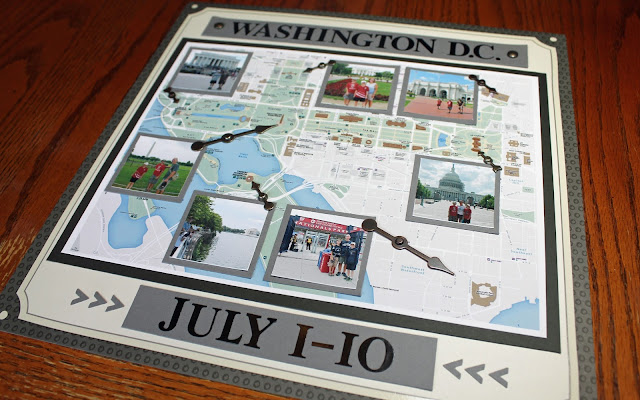
I'm finally getting back into the groove a bit and have started working on a cover page for one of the next albums I'll work on. In July we took a vacation to Washington D.C., so I've been thinking about how I would do album cover pages for this trip. There will be 2 albums for this trip, so this is the cover page for one of them.
I've used maps quite a bit before in travel albums, but this time I wanted to try to highlight the map with a few of the places we visited. There was no way to do this for all of the places we went during that trip, so I'm planning to do more of an itinerary style layout for the second album, and keep this one more simple with just the map and some highlights.
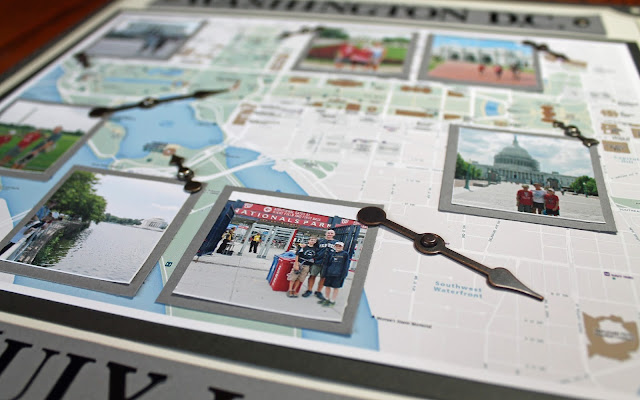
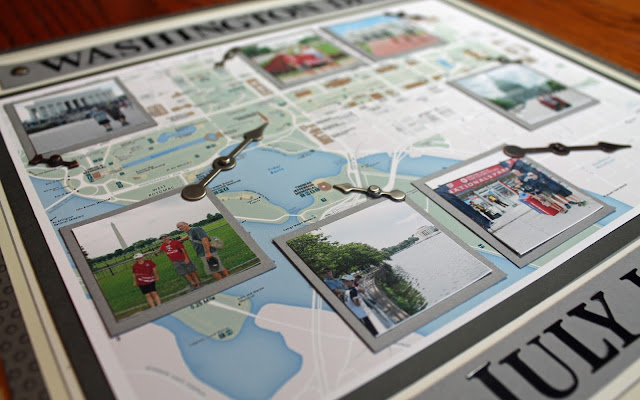
 I was able to find a map that I liked the look of online, and resized and printed it out at home. I then had to decide how many places I would highlight, and how to highlight them. I thought a small, thumbnail image of a few of the places would look nice, so picked a few of the main attractions and decided to highlight those. I chose, resized, and printed out 7 of my photos to use on the cover. I also created a header and footer banners (with grey cardstock and stickers) with just the words "WASHINGTON D.C." and our travel dates to finish it out.
Then it was time to put it all together. I chose a piece of 12x12 paper that had an interesting border around the edge, and I cut some darker grey cardtock to mount the map and the thumbnail photos on. I then took all of these pieces and placed them all on the background paper, and shuffled and moved things around until I liked the look of it. I also had some metal arrow brads that could be used to point to places on the map from each photo.
This layout came together really quickly and even though I switched around the thumbnail photos a bunch of times and thought I might have space to add a few more, I decided to keep it as it was and not clutter it up with more. Here is the final layout:
I'm quite happy with how it turned out, and the color scheme and clean lines are something I hope to carry on to the rest of the layouts in this album. Now I just need to to edit and order the photos from this trip so I can get started!
One of the hardest parts of scrapbooking can be comparing yourself to others and comparing your layouts to what you see in scrapbook magazines or online galleries. Since I've been scrapbooking over 15 years, I've seen a lot of trends come and go, new products and techniques that become all the rage and then slowly died off. When I look through some of my own albums, I can't imagine the stores selling some of those types of supplies anymore - they just don't look anything like what is out there now.
But beyond that, everyone has their own style and sometimes it can be hard to realize and fully embrace one lingering observation you've seen time and time again: Your stuff just doesn't look like other people's stuff.
It just doesn't. And it's really okay.
I've recently found myself posting some layouts to an online gallery at a scrapbooking site, and 95% of what I see out there is completely different from what I do. These layouts are beautiful and the creativity pours from them, but as I scroll through page after page of other people's layouts, it becomes more clear that I have a very different style from what is popular now and how most people scrapbook.
And your mind starts to wander with all of the questions: Maybe I'm stuck in my old way of doing things? Maybe I do it this way because it's easy and it's what I know and am comfortable with? Maybe I'm just not as creative as other people? Maybe what I do doesn't fit into this world of scrapbooking anymore?
And you wallow in it for a bit. And you wonder, and you doubt.
But then the truth strikes. My pages aren't this way by accident...it's intentional. I want them to look this way. Because this is how I like them, this is how I tell my story, and this is what I think looks good. I like clean designs and simple layouts and geometric patterns. I like earth tones and subtle patterns and letting the pictures stand out on the page. I like a lot of photos on the page - each photo is a memory...a moment you'll never get back. I don't want just one on each page, I want as many as I can squeeze onto each page.
I want my pages overflowing with smiles and scenery and moments and memories. All those things we did together and all those moments we shared. For me, that is what it's all about and that if means that my pages don't look like everyone else's then I'm okay with that. I'm okay with being different, or plain, or simple. I'm okay with not fitting in and I'm okay with the fact that not everyone will like what I do. Because I'm not doing this for them, I'm doing this for me and my family.
It's been almost 5 months since I have scrapbooked, and in those months I've questioned and wondered if this is something I should even do anymore. Does it really matter if I make these albums? Does anyone really care? But when I see my kids pull one of their albums off the shelf and look at it, or we grab a vacation album and look at the photos and talk about the things we saw and did together, I know it does matter. And I have to keep going.


