Wednesday, March 30, 2016

School Band Concert Layouts

Today I pulled out my son's school album to see what photos I needed to scrap in there. When I get the photos back from printing, I usually toss them into a page protector in the album and they stay in there until I decide to work on the book. I had worked on the albums about a month or so ago, and didn't really remember where I left off. So when I grabbed it, I was happy to see that there were just 2 groups of band photos to catch up on - a nice little project for this rainy day.

I had purchased a few sheets of band themed paper and some stickers a while back, so I knew I had some supplies to get me started. I grouped the photos by which concert they were from, and decided to do one layout for each.

The first layout I had the program from the concert, so that took up a bit of space. But I had fewer photos for this layout, so it balanced out okay. I used the cover of the program on the first page, then cut the song list and section of the program that had my son's name out to place on the layout as well.


School Band Concert Scrapbook Page Program Music

The second layout I had several photos for but no program - there wasn't one for this event. I decided to do a heading banner with the concert name and then placed the photos out symmetrically on the pages, trimming down 2 photos where I needed to.


School Band Concert Scrapbook Page Program Music


For both layouts I used some band themed stickers and some musical brads that I had found at a local craft store. The musical paper added some nice patterns and I added in one sheet of blue argyle paper just to accent the blue color I was using for the background paper.

Although the layouts are from 2 separate events, I wanted to use the same color scheme on both - so I tried to limit my papers and stickers to black, white, blue and yellow, to give them a nice, unified feel in the book. 


Thursday, March 24, 2016

Tackling the Next Project - Puppy Pictures


A little over a year ago we welcomed a beagle puppy into our family. The first few months that we had him, I took A LOT of photos. Like more than I could even bear to edit or go through or print. So they've sat in a folder on my computer for the last year and I finally got through them, and edited and printed those I want to put into the scrapbook. I printed about 200 photos, and now they need to find a home in a scrapbook.

I decided to do a dedicated album for this, since I had an extra album, and putting them in with my yearly family photos would have required getting another rind-bound album for the year. So, our little dog Scout will get his own baby book of sorts..."Scout's First Year."


I completed the cover page for the album today, and am about ready to start tackling all of the photos. 


I'm hoping that I can get all of the photos done in about 20-30 2-page layouts, and complete the album in the next week or so. I purchased two dog themed scrapbook kits, and I have no idea if that will be enough to make the album, but it is a start. These are the last remaining photos from 2015 that I have to scrapbook, then 2015 will be complete! So, off we go!

Monday, March 21, 2016

Coordinating Supplies for a Future Trip

The last couple of months I've been planning our next trip, and in doing so have also been planning our next scrapbooks for...Washington DC! I spent a lot of time looking up Washington DC layouts and getting ideas for what others have done, to help me decide what I want to do. DC is an interesting mixture between old and new, historic and modern, subtle and flashy. It will be an interesting trip and a different kind of scrapbook for me - I've never scrapbooked anything really modern or "big city". Our other trips have been camping and national parks and staying in old lodges. DC will definitely challenge my scrapbook style. 

Picking supplies is an important part of any album and really sets the tone for what the album will look like. With that in mind, I want the album to have that historic-yet-modern and subtle-yet-flashy flair. I don't want it to be all red, white, and blue, or all flags, stars, and stripes. I think I can do it differently and still make it feel patriotic, while bringing in those modern and traditional elements.

I started the process by going through my own stuff and seeing what I had that I could use. I found 2 Teresa Collins kits that I really like the colors and patterns on, and have the vibe I was looking for:


I continued to look though paper and also found these which would work - the white and grey match both kits and the wood grain is a close enough match to the tan color in the Snapshots kit. Mixing of old and new here:


In my accent papers I found these, again great patterns (mix of modern and traditional) and the color pallet goes:


That was all I had in my own stuff, so a little shopping was in order. I found albums on clearance and ordered the Teresa Collins journaling card kits that coordinated with the paper kits, and some Teresa Collins labels:


Now came the tricky part. While these supplies have red and white elements, none of them have blue. I need to introduce some blue. We will be in DC over the 4th and I want to have some 4th of July papers and supplies, at least for stuff we do that day, including a baseball game (the Brewers play the Nationals in DC on the 4th...already got tickets! Go Brewers!) I had some baseball papers that matched up well and had the red-white-grey color scheme, and found the Simple Stories Stars and Stripes kit online and just loved it. It's a little rustic but again it's all about mixing old and new:


I still need to pick up a few DC specific embellishments, but that's where I'm what I have so far. This will be our DC book...or books...I'm limiting myself to 2 books only for this trip which will mean a lot of photos on fewer pages and will force me to get more creative with fitting photos on the page.

Do you think this color pallet and design will work well with DC photos even though there is not a lot of red, white, and blue or flags, stars, and stripes?


Friday, March 18, 2016

Disney's California Adventure Album

Today marks the beginning of spring break for my kids - after school today they will be home for the next 10 days! Hopefully it will be spring-like and we can get outdoors and do a few things. Since we are not going anywhere for spring break, I pulled out a vacation album from a couple of years ago and reminisced about hot summer days, fun rides, and great memories. 

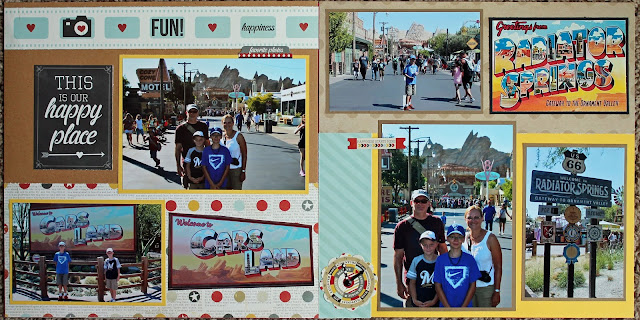
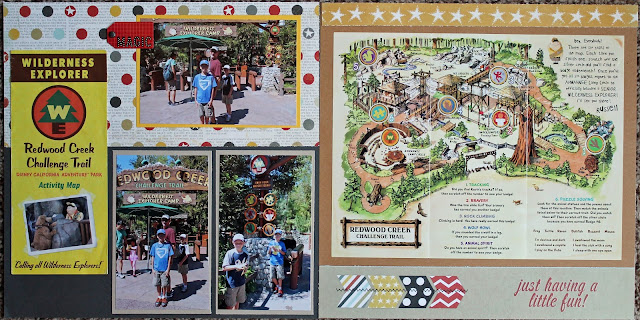
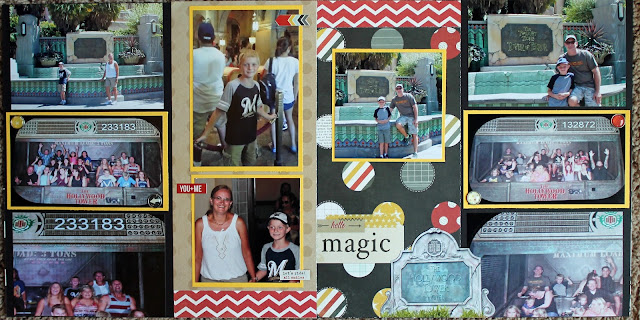
Disney California Adventure Scrapbook page cover Simple Stories Say CheeseTwo years ago we took a family vacation to California and spent a few days at Disneyland and California Adventure. It was a great trip and although I made some of the layouts right after the trip, the rest lingered for a while and I just finished them last fall. Today I photographed the California Adventure album and added it to the gallery. This album was the first time that ever used one collection of supplies for an entire album. I've since done it in other albums, but it was a first for me then, and I had worried that the album would seen repetitive since I only had a limited number of papers and embellishments to use. While I wanted the album to have continuity, I did't want every page to look just like the last page.

To try to break up the repetitiveness, I decided to focus on the color scheme and the colors that I accented different layouts with. For some areas of the park, I focused on bright primary colors and used those for background and accent papers:


Disney California Adventure Scrapbook page cover Simple Stories Say Cheese

Disney California Adventure Scrapbook page cover Simple Stories Say Cheese

For other lands in the park, I focused on the earth tones and lighter shades in the collection, the browns and greys, to give it a different feel:


Disney California Adventure Scrapbook page cover Simple Stories Say Cheese


Disney California Adventure Scrapbook page cover Simple Stories Say Cheese

I also used black accent papers heavier in some layouts than others, in night time layouts or rides that were more serious and scary, like Tower or Terror:


Disney California Adventure Scrapbook page cover Simple Stories Say Cheese

Disney California Adventure Scrapbook page cover Simple Stories Say Cheese


It's a subtle difference I think, but I like it and like the idea of intentionally accenting different colors on different pages. Different shades can change the mood of our layout and when using a collection that limits your different patterned paper choices, using different solids can help keep the layouts from looking too repetitive. Although all of the layouts use the same patterned papers over and over, each layout is unique.

The full album is posted here if you want to check it out!


Thursday, March 17, 2016

Snowshoeing Layout

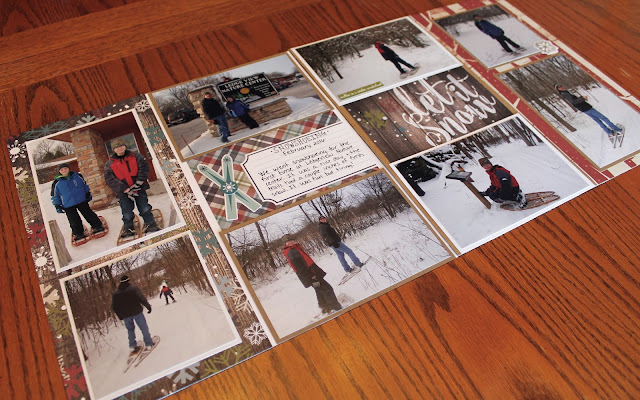
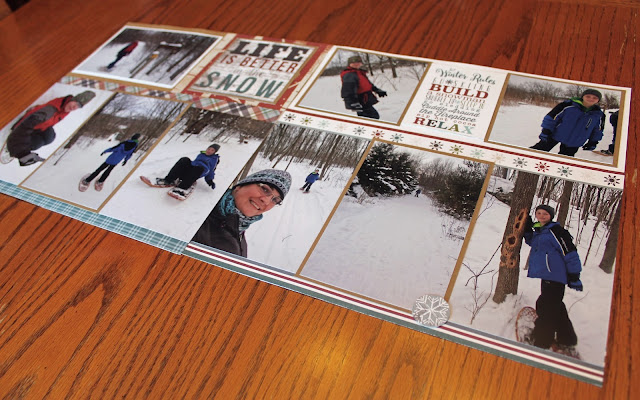
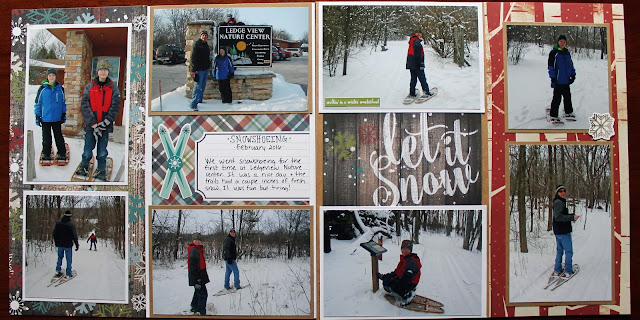
I'm finally moving forward on some 2016 pictures again, and have 2 sets of photos from some winter activities we did that I started to scrapbook. The first set of photos is from when we went snowshoeing in February. I don't usually have a lot of winter themed supplies, because honestly we don't go out and do many winter activities, so I had to buy something to go along with these winter photos. I came across the Simple Stories Snow Patrol kit and just loved it!


Snowshoeing Scrapbook page winter Simple Stories Snow Patrol

Snowshoeing Scrapbook page winter Simple Stories Snow Patrol

In addition to the kit, I added in one sheet of red paper that had trees on it that I liked for this layout, and the colors matched so well that looks like it's part of the kit. The layouts came together pretty easily - very geometric and balanced. I had lot of photos to use and ended up having a few extra, but I got on as many as I could.

I have plenty of supplies from the kit to also use it for our ice skating photos - which will be the next layouts that I work on. After these I can start looking forward to spring!

Snowshoeing Scrapbook page winter Simple Stories Snow Patrol

Snowshoeing Scrapbook page winter Simple Stories Snow Patrol

Monday, March 14, 2016

Scrapbook Album Storage: Ikea Kallax System

Ikea Kallax Scrapbook Storage shelf
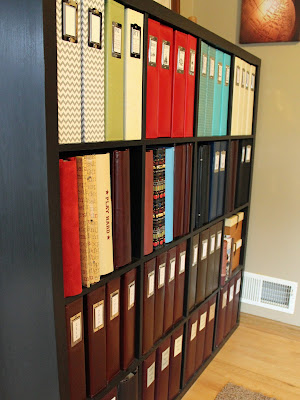
About year ago I finally broke down and ordered an actual shelving unit to hold my scrapbook albums. Up until then, the albums has been scattered about on various shelves throughout the house that they didn't really fit on - 12x12 albums are so wide that most standard bookshelves are not deep enough to hold them - a couple of inches would always hang over the edge.

I started looking for album storage units and found out that most people use the Ikea Expedit units. But when I went to look for one, the Expedit was discontinued and had been replaced by the Kallax collection. So for my Christmas present last year I ordered one - the Kallax 4x4 cube shelf. While the price was reasonable, the shipping charge was outrageous! I could have driven to the nearest Ikea to pick it up, but a 4 hour drive, a tank of gas, $15 in toll roads, and full day spent to get it seemed like a lot of work that I didn't really want to do, and it would still cost us about half of the shipping cost. So we opted to just pay the shipping. 
Ikea Kallax scrapbook storage shelf 12x12

It ended up being one of the best purchases I've ever made for scrapbooking. I love this shelf! It is super sturdy and fits 12x12 albums perfectly! I just reorganized it after finishing up a couple of new albums, and realized that the shelf will probably be close to full in the next year.

Luckily, Ikea sells a complimentary piece of the Kallax collection that is a 2 x 4 rectangular cube that I can stack on top of this one. I've seen other people stack the units, so I think it can be done, and I have just enough space to have it fit. Adding that unit should give me several more years of storage space. I'm thinking I should get it now, before it gets discontinued like the Expedit shelves did.

Have you used the Expedit or Kallax systems? Have you stacked them? Can it or should it be done? Any problems with the weight?

Sunday, March 13, 2016

Sports Cover Pages with Placeholders for Future Seasons

I finished up the last 2 sports cover pages this weekend. I'm kind of working ahead here, and making cover pages with placeholders for future photos. It's kind of risky, as no one knows for sure what the future will hold, so I'm going out on a limb here and assuming that my son will continue to play these sports for the next few seasons. He's a bit of a sports fanatic so I think I'm pretty safe.

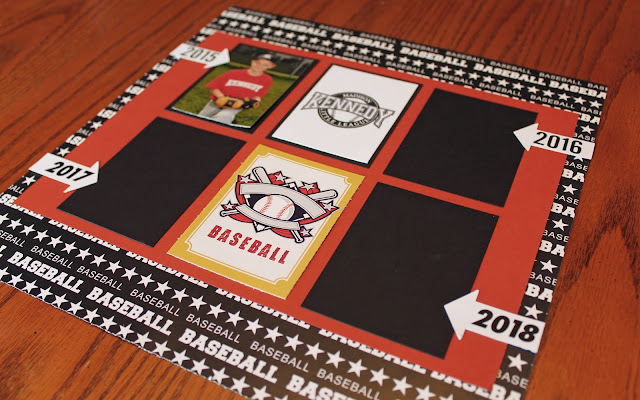
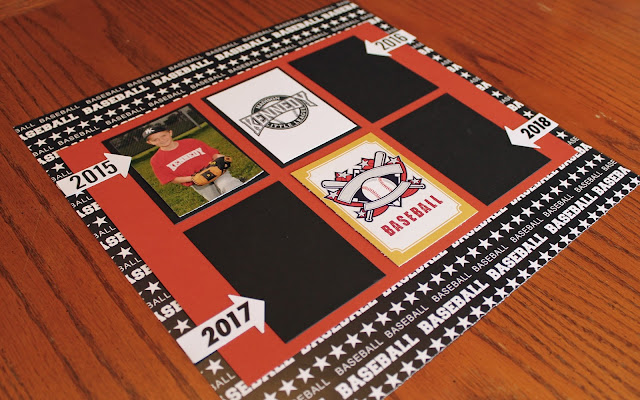
I started a new baseball album with photos from 2015 and forward since the other album is completely full. Since I already had the 2015 layouts completed, I just needed a cover page for the album.


Baseball Scrapbook Page Cover Timeline Seasons Card Player

Baseball Scrapbook Page Cover Timeline Seasons Card Player

For this layout I just used the back side of the first layout in the book, which happened to be a double-sided sheet with the black and white baseball words on it. I mounted a red 8x11 sheet in the center, and cut 5 black pieces to mat the photos on. I was able to download and print out the baseball league's logo and add that to the design. I added a baseball themed card to balance out the geometric layout, and used an arrow punch to make the white arrows. 

Since I tend to make about 10 pages per season for baseball, I'm again assuming that I'll be able to get 4 seasons worth in this one album - or about 40 pages. That seems to be about the maximum number of pages I can comfortably get into a ring-bound album, so I'm going with it. 

I also created the cover for the next soccer album. This album should hold 2 years worth of soccer (4 seasons with spring and fall, plus a few pages of indoor), so I've set up the cover page to have his current team and season, as well as his next years team and season.


Soccer Scrapbook Page Cover Timeline Seasons Card Player

Soccer Scrapbook Page Cover Timeline Seasons Card Player

This layout was again pretty simple - I double mounted the photo squares and added a few strips of soccer paper. I printed out the header banner with the logos, and added a row of soccer word stickers along the middle and bottom of the page. I had these large soccer brads that I had found on clearance at a local store, and thought they'd make a nice touch to the banners. 

If feels good to "work ahead" a bit and have these pages done. I don't know why I never did cover pages for these albums before, I guess the albums were always a work-in-progress with new layouts being added each season. I never thought to do covers for them since they were always changing. With the albums now more permanent, all I need to do each year is add the layouts for that season and put a small photo on the cover page. This should make it easier to stay caught up!

Saturday, March 12, 2016

Soccer Album Cover Page

After finishing the Baseball Cover Page yesterday, I moved on to the cover page for the Soccer album. This album has a lot of seasons of soccer in it (we have a split season so we have spring and fall, plus a camp and an indoor season), and I wasn't sure how to go about making a timeline for this - I knew I wasn't going to be able to make it all fit on a traditional timeline across the page.

I did like using journaling cards to hold a small photo of each season like I used in the Baseball Cover Page, so I used that technique again here - just with a few more cards.


Soccer Scrapbook Page Cover Timeline Seasons Card Player

Soccer Scrapbook Page Cover Timeline Seasons Card Player

I added a strip of patterned paper along the top and bottom of the page, and a small piece behind the center journaling card as an accent. But really there is so much pattern and design in the journaling cards that I didn't need or want to add much more to the page. I was able to download a logo from our soccer organization's website and print that out as well to add in the center. And that was it! Just two more sports cover page to go and I'll be caught up - and I'm working on them already since I feel like I'm on a bit of a roll!

Friday, March 11, 2016

Baseball Album Cover and Timeline Page

Well I went ahead and got the new albums yesterday - I went with the ring-bound ones. So I had a project yesterday to take apart the old sports albums and reorganize the pages into the new albums. I only got 2 albums to start with, which both ended up being used for soccer layouts, and re-used one of the post-bound albums for the baseball layouts. Once I had the albums reconfigured, I realized that they will now need new cover pages since I've shuffled around what is in each album, so I started on the cover for the baseball album.

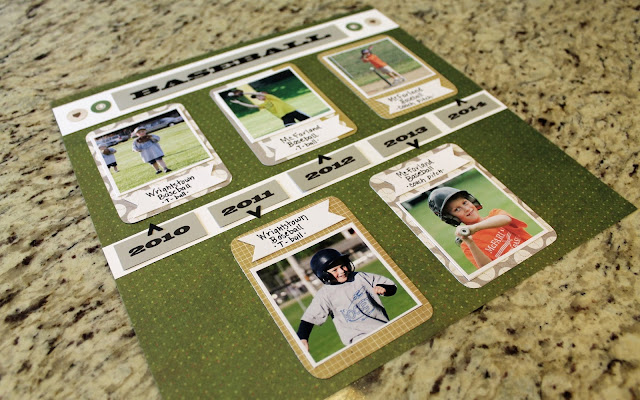
Since I've had this idea of doing more timelines in my layouts, I decided to a timeline of sorts of the baseball teams he has played on over the years. I had 5 years of photos in this album so I pulled out 5 journaling cards and started to put together a layout. The idea was to make them look like baseball cards, but I had no stats or anything so I just simplified it and used a photo and a banner.


Baseball Scrapbook Page Cover Timeline Seasons Card Player

Baseball Scrapbook Page Cover Timeline Seasons Card Player


This layout took me WAY more time than I care to admit! From just working through the layout, to printing the labels, to choosing and resizing and printing the photos, I easily had over an hour into this layout, maybe closer to 2 hours. There was just a lot of detail work with all of the labels, banners, and arrows.


Baseball Scrapbook Page Cover Timeline Seasons Card Player

I'm pretty happy with it and I like how the idea of the timeline worked out. Now I need to come up with another idea for a cover page for the soccer albums, at least the first one since that album is complete and I won't be adding any pages to it.


As for the new albums - I just love them and will need to get at least one more. One of the new albums is filled with 3 years of soccer, and the second album has last fall season and is ready for spring season - and should fit all of next fall and spring as well. I still need one more album for baseball pictures from 2015 forward, which I should probably order soon before they are discontinued and I can't get the color that matches. Then I should be set on albums for at least a year or two.

Happy Friday!

Thursday, March 10, 2016

Post-Bound Versus Ring-Bound Albums


When I first started scrapbooking ring-bound albums were not even being made yet, so I started with all post-bound albums. Like any good scrapbooker, as my albums grew larger and larger, I needed to add more posts and had to constantly take the albums apart to add additional layouts or move things around. And the albums were difficult to handle as the lengthened posts were not very sturdy against the weight of all of those pages. They'd bend and twist and I'd dare not handle the albums any more than necessary.

Then ring-bound albums came out and I, like so many others, was saved from the frustration of post-bound albums. Post-bound albums do have their place - if your album will be 20 pages or less then post-bound albums will work perfectly. And there are so many great cover designs for post-bound albums that we are just starting to get now in the ring-bound world.


I really do love ring-bound albums. I converted all of my family albums to ring-bound years ago, and only buy ring-bound for albums now. With one exception - my kids school and activities albums. Their school albums are broken down by school - so I'm managing to keep them small enough that I can still fit them all in a post-bound. My dilemma now is about their sports and activities albums - they are bursting at the seams and I need to either get more post-bound albums to expand into, or switch them over to ring-bound and be done with it. Either way I'm buying more books, so it really comes down to space and storage. And future storage.

I know there will be more and more pages added as the years go on - my kids do a fair amount of activities and I know for one of them at least, I'm averaging 30-40 pages a year to cover his different sports seasons (I try to keep it to 8-10 pages per season for each sport he's in.) It's basically the equivalent of an album each year. So what do I do....keep them or convert?

By switching I can get more layouts in each album, which will reduce the number of albums I need overall. If I do convert to ring-bound, I could also reorganize the albums by sport since right now it is a mixture of all activities done chronologically.  

So, should I stay post-bound or go ring-bound? Help!

Wednesday, March 9, 2016

Creating Itineraries and Timelines in Your Layouts

I've been thinking a lot lately about itineraries and timelines and how they are used in scrapbooks. I've made a few different itinerary-type pages for travel books, but really haven't used them in any other types of books, and I'm thinking it might be time to elaborate on this idea.

A timeline doesn't have to take place over a long period of time, it could be the course of a week, a weekend, a school year, or a sports season. It could be just one day.  

An itinerary or timeline page can make a great cover page to an album, or be a fun corresponding page to another single page layout you may have. The itinerary pages below are a simple grid with the days and locations noted - I also like to add a logo or graphic of the location if I can.


Disney World Scrapbook Page Cover Timeline Itinerary

California Vacation Scrapbook Itinerary Page Timeline Cover Postcard

You can also do an itinerary in a more geographical way by showing where you went on a map and when. Here I highlighted the route we drove each day and stops we made along the way.


Yellowstone National Park Scrapbook Page Layout Map

This layout is the itinerary of just one day - these were the places we stopped along the scenic drive in Glacier National Park, which we drove in one full day.


Glacier National Park Scrapbook Page Layout Map Going to the Sun Road Sign

You may not want to dedicate a whole page to your timeline or itinerary, so you can easily use a journaling card or another type of tag to add a small timeline to your page. These mini-timelines can be a great way to detail your family traditions and annual events.


As I look through my own books I've realized that I haven't really done much with timelines and it's something I want to try to focus on more in my future pages. I have several old family albums that don't have cover pages, that I could go back and add a "year in review" kind of timeline - highlighting certain events from that year. I could also do this for my kids sports albums and highlight the different sports and activities they've participated in over the years.  

I did some image searches and found some really great ideas for timeline pages that I'm excited to add to my own books. What ideas have you used for timelines and itineraries?  What is your favorite?

Tuesday, March 8, 2016

Christmas Morning Layouts

Since I'm trying to finish up all of my photos from 2015, it was time to tackle the Christmas photos. I had previously worked on the Christmas Eve photos, so I just had photos from Christmas Day left to work on.

I had recently been looking at some online galleries of other peoples scrapbook pages, and had come across a layout that I really liked, so I decided to try to re-create it with a few of these photos. It required scaling back a bit on the number of photos I use on each page, but I was ready to try something new and a little different from my usual layouts. So I gave it a shot.

Here is the page that I re-created from another:


And this page I made on my own to compliment it:

I had a large collection of Christmas papers that I had received as a gift and they all coordinated together, so choosing papers was a pretty easy process. All I needed to do was figure out the photo placement for the second page, since I was using that other layout as a guide for the first page. I added a few stickers that I already had and it was finished!

They turned out pretty nice and in the end I'm happy that I tried something new and different!

Sunday, March 6, 2016

Hockey Game Layout

This weekend I jumped into some of my new 2016 pictures and started on a few layouts. The first thing I worked on was a layout for a hockey game we went to in January. I was a little worried since I didn't have any actual hockey themed scrapbook supplies, so I just decided so use a few general sports themed things that I had, and to use some simple papers to create the color scheme I wanted.


Since I didn't take a lot of photos at the game, I only made one layout. I used white cardstock and layered on a black paper with dots, and a grey and black striped paper. I used some red cardstock to mat the photos, and added in our tickets and a journaling card. I also used the back of a journaling card to put letters on for the Wisconsin Badgers title, and I think it turned out great!