I've been thinking a lot lately about itineraries and timelines and how they are used in scrapbooks. I've made a few different itinerary-type pages for travel books, but really haven't used them in any other types of books, and I'm thinking it might be time to elaborate on this idea.
A timeline doesn't have to take place over a long period of time, it could be the course of a week, a weekend, a school year, or a sports season. It could be just one day.
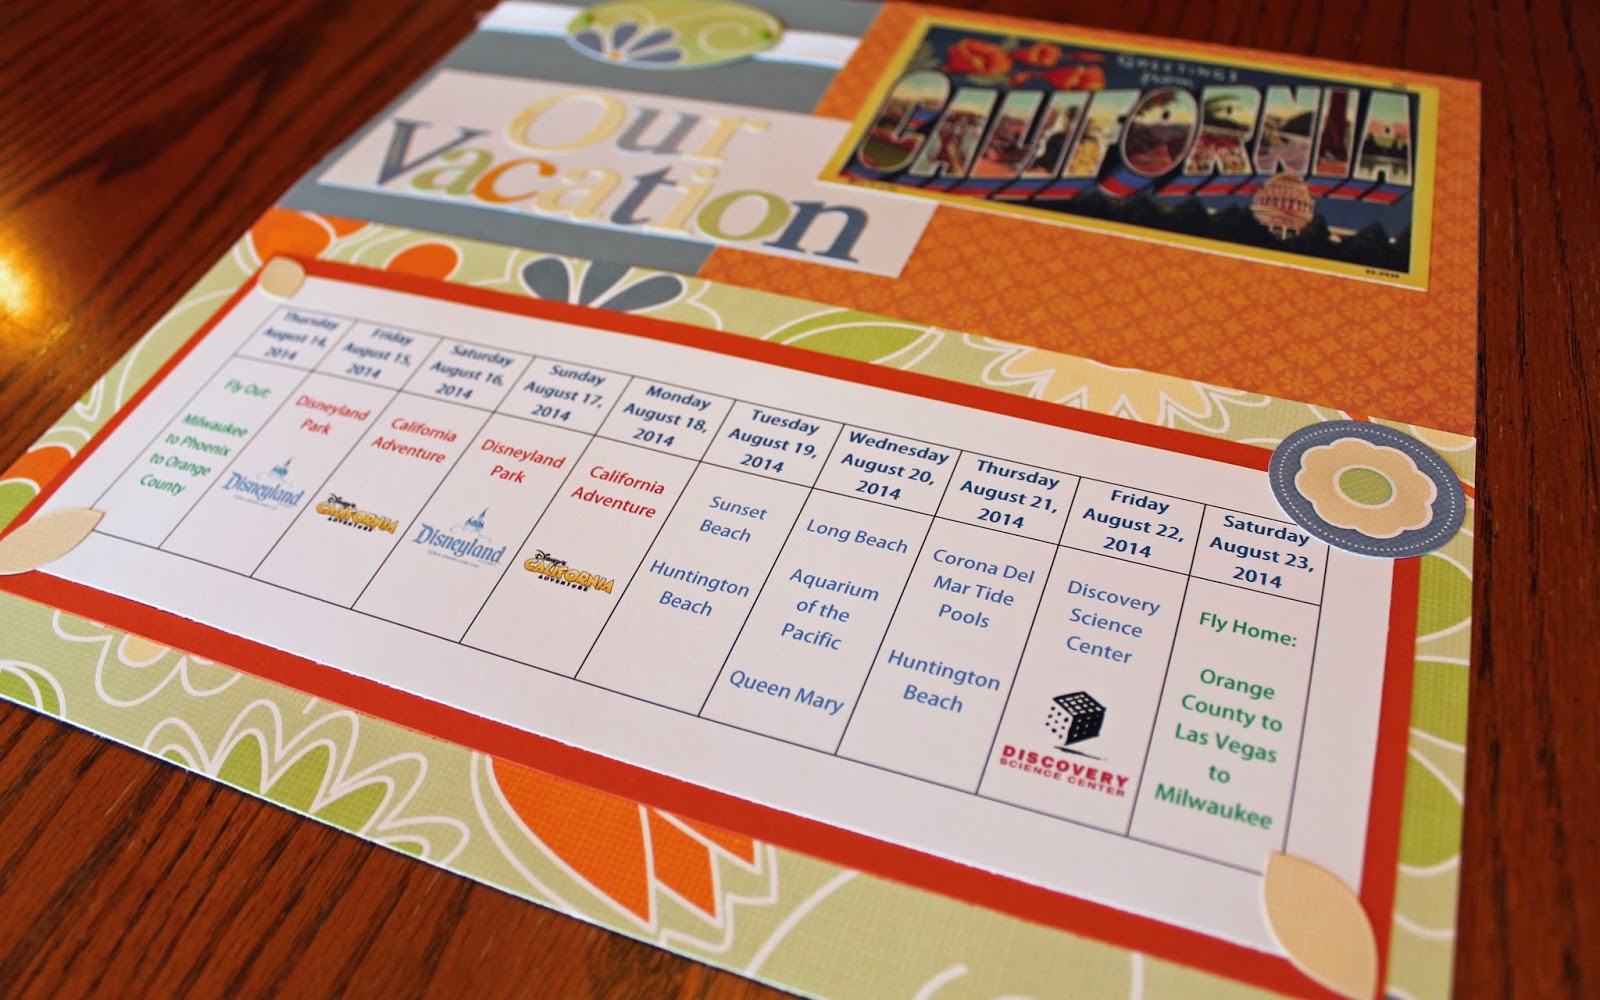
An itinerary or timeline page can make a great cover page to an album, or be a fun corresponding page to another single page layout you may have. The itinerary pages below are a simple grid with the days and locations noted - I also like to add a logo or graphic of the location if I can.
You can also do an itinerary in a more geographical way by showing where you went on a map and when. Here I highlighted the route we drove each day and stops we made along the way.
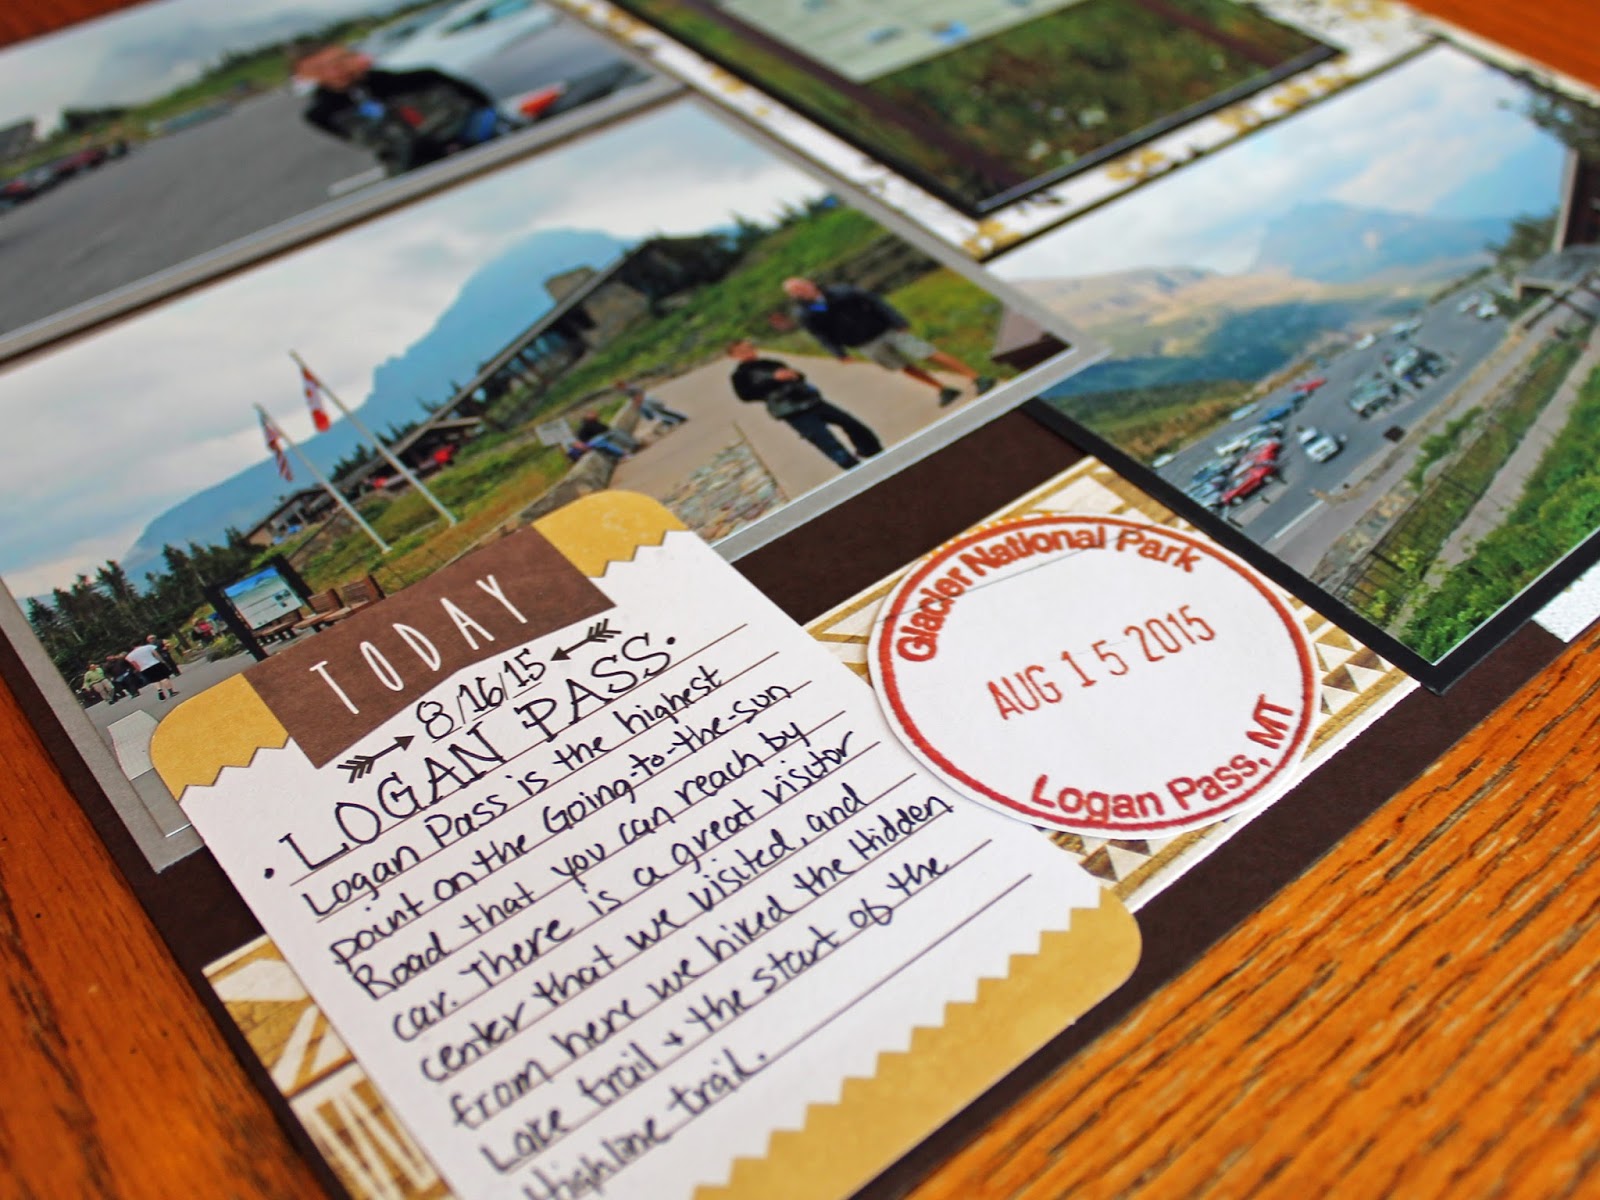
This layout is the itinerary of just one day - these were the places we stopped along the scenic drive in Glacier National Park, which we drove in one full day.
You may not want to dedicate a whole page to your timeline or itinerary, so you can easily use a journaling card or another type of tag to add a small timeline to your page. These mini-timelines can be a great way to detail your family traditions and annual events.
As I look through my own books I've realized that I haven't really done much with timelines and it's something I want to try to focus on more in my future pages. I have several old family albums that don't have cover pages, that I could go back and add a "year in review" kind of timeline - highlighting certain events from that year. I could also do this for my kids sports albums and highlight the different sports and activities they've participated in over the years.
I did some image searches and found some really great ideas for timeline pages that I'm excited to add to my own books. What ideas have you used for timelines and itineraries? What is your favorite?
Showing posts with label srapbooking. Show all posts
Wednesday, March 9, 2016
Monday, February 29, 2016
Road Trip Series #5: Mount Rushmore National Park
After stopping at Devils Tower, we headed straight for Mount Rushmore - it would be the last stop on our road trip before heading home the next day. It was early evening when we arrived, and since it was a chilly and windy night, we didn't hike any of the trails. We did see the monument from the overlook, and spent quite a bit of time in the Visitor Center.
The Visitor Center had some excellent exhibits and we spent a lot of time looking at them. My son worked on his Junior Ranger booklet, and we picked up his badge before we left. It was another quick stop for us but something we wanted to see since we were so close. This was the last stop on our road trip and the last of the road trip layouts.
For these layouts, I combined a few patriotic themes papers with red, white, and blue stripes. The map and brochure were picked up at the visitor center, and I added photos of the passport stamps and my son's badge as well. The map on the second layout is the inside of the brochure that is on the 3rd page (I picked up 2 brochures while there.)
This is the end of the 2015 road trip! Where have you gone on a road trip? What was your favorite road trip stop?
(click on the layout for a larger view)
The Visitor Center had some excellent exhibits and we spent a lot of time looking at them. My son worked on his Junior Ranger booklet, and we picked up his badge before we left. It was another quick stop for us but something we wanted to see since we were so close. This was the last stop on our road trip and the last of the road trip layouts.
For these layouts, I combined a few patriotic themes papers with red, white, and blue stripes. The map and brochure were picked up at the visitor center, and I added photos of the passport stamps and my son's badge as well. The map on the second layout is the inside of the brochure that is on the 3rd page (I picked up 2 brochures while there.)
This is the end of the 2015 road trip! Where have you gone on a road trip? What was your favorite road trip stop?
Saturday, February 27, 2016
Road Trip Series #3: Virginia City Ghost Town
After leaving Glacier, we drove about 9 hours to Yellowstone National Park. On the way we stopped at Virginia City, Montana, an old 1860's mining town. Technically a ghost town since there are no permanent residents, Virginia City is now a tourist attraction and there are businesses there, but it is considered one of the most intact towns from that time period, and definitely worth stopping at. There are 2 towns just a couple of miles apart - Nevada City and Virginia City, we stopped at both.
I actually had a really hard time choosing paper for these layouts. How do you scrapbook a ghost town? It's not like there are papers and supplies with a ghost town theme, and I didn't want it to have a halloween type feel. I choose some rustic papers that had a little bit of a modern design and added a few pieces of paper with some old fashioned patterns - almost like old wallpaper, and decided to blend the two. The color combinations went together, so I decided to go with it. I added some photo corners to a few of the photos for a little bit more of the old fashioned feel.
We stayed in Virginia City for an about hour, then got back on the road to get to Yellowstone. It was a good stop, the kids really liked it and we would have stayed longer if we could have.
Next stop - Devils Tower National Monument
We went to Yellowstone from here, but again that's not in this album so I'll skip it. On with the road trip!
(click on layouts for a larger view)
I actually had a really hard time choosing paper for these layouts. How do you scrapbook a ghost town? It's not like there are papers and supplies with a ghost town theme, and I didn't want it to have a halloween type feel. I choose some rustic papers that had a little bit of a modern design and added a few pieces of paper with some old fashioned patterns - almost like old wallpaper, and decided to blend the two. The color combinations went together, so I decided to go with it. I added some photo corners to a few of the photos for a little bit more of the old fashioned feel.
We stayed in Virginia City for an about hour, then got back on the road to get to Yellowstone. It was a good stop, the kids really liked it and we would have stayed longer if we could have.
Next stop - Devils Tower National Monument
We went to Yellowstone from here, but again that's not in this album so I'll skip it. On with the road trip!
Monday, February 22, 2016
Mountain Biking Layouts
Today I finished up some mountain biking layouts for my son's album. Last summer he participated in a youth mountain biking club, and I took a few photos of him at the traihead. (Sadly, no group photo as that would have way too embarrassing for him! I'm always "that" mom with the camera in her hand!)
I had to search a little bit for some biking related scrapbook supplies since there is not a lot out there, but I found some by Scrapbook Customs that worked pretty well.
He also did some biking through our school distict's summer school program - he did 4 of the 5 trail trips they offer. Before he left I handed him my point-and-shoot camera and he took a few photos along the trail. It is always fun and interesting to me to see what my kids take photos of when they have the opportunity. With his photos, I made 2 layouts of those bike trips.
We are planning to do more mountain biking this year so I will have to start looking for more biking papers and supplies - we have a goal to bike a few state trails end-to-end once spring and summer get here. Mountain biking is my son's favorite activity and it'll be good for all of us to get out on our bikes more. More biking adventures to come in 2016!
I had to search a little bit for some biking related scrapbook supplies since there is not a lot out there, but I found some by Scrapbook Customs that worked pretty well.
He also did some biking through our school distict's summer school program - he did 4 of the 5 trail trips they offer. Before he left I handed him my point-and-shoot camera and he took a few photos along the trail. It is always fun and interesting to me to see what my kids take photos of when they have the opportunity. With his photos, I made 2 layouts of those bike trips.
We are planning to do more mountain biking this year so I will have to start looking for more biking papers and supplies - we have a goal to bike a few state trails end-to-end once spring and summer get here. Mountain biking is my son's favorite activity and it'll be good for all of us to get out on our bikes more. More biking adventures to come in 2016!
Tuesday, February 16, 2016
Scrapbooking National Park Trips
If you are planning a National Park trip, there are many different things you may want to add to your scrapook. Here are a few things to keep an eye out for or think about adding to your book:
2. Park Maps and Brochures - be sure to pick up any park maps and brochures that you find along the way. You'll most like use these as you travel, and they are great to add to your scrapbook. I always pick up 2 so that I can keep one intact and cut the other apart if needed.
3. Visitor Centers - many National Parks have great Visitor Centers and Ranger Stations. Stop in at these and take a few photos of the old structures or great exhibits. While you are there, look for brochures and maps, and get a Passport stamp!
5. Pull-outs and Turn-outs - most scenic drives will have various pull-outs and turn-outs for you to stop and take in the scenery. Some parks have a lot of these and it's easy to lose track of what you saw where. Most will also have a sign of what that particular pull-out is named or what you are looking at. Snap a picture of the sign before you start taking scenery pictures...when you get home, you will know exactly which pictures were from which overlook. You can also use those sign photos as labels in your book!
6. Trailheads - if you do any hiking, the trail should be marked with a trailhead sign. There will most likely be additional signs showing distances and directions on the trail. Snap a photo of the sign before you head out on your hike.
7. Lodges - many National Parks have historic lodges on site, and all of these are open to the public - you don't have to be staying there to walk through the lobby, eat at the restaurants, or shop in the gift shops within them. Visiting the old lodges can be a fun part of your trip, just like seeing the rest of the sites in the park. We try to stop at any of the lodges we are not staying at to check them out or grab a meal, but also to sit on the porches overlooking a lake, walk along the beach or lakeshore behind them, and just take in the scenery. Some of these lodges have great architecture and huge old logs that you may want to get photos of for you book.
10. Scenery shots and detail shots - most people travel to national parks and monuments to take in the sights and see the monuments. When taking photos of these places, be sure to get a lot of scenery shots, but also detail shots. I've talked about detail shots before in this post, but take a few minutes to walk around and really notice the little details - bark on a tree, texture of old bricks, smooth rocks on the lakeshore. These can be great and unique additions to your scrapbook.
8. Postcards - the National Park Service has some great postcards - many depicting historic artwork of scenes in the parks. Pick up a couple of your favorites - there are tons to choose from and the art makes a great addition to your scrapook!
9. Junior Ranger Badges - if your children want to participate in the Junior Ranger program, pick up the booklet at the visitor center and work through the booklet during your visit. Before you leave, stop back to the visitor center where a Ranger will check over the booklet and award your child their Junior Ranger badge. Some places also have a Junior Ranger Patch that you can purchase after you earn the badge. We've participated at several parks - they can range from fairly easy to quite difficult to earn! But they are fun to do, make for great photo ops, and once home you can take a photo of the badge or patch and add it to your book.
10. Scenery shots and detail shots - most people travel to national parks and monuments to take in the sights and see the monuments. When taking photos of these places, be sure to get a lot of scenery shots, but also detail shots. I've talked about detail shots before in this post, but take a few minutes to walk around and really notice the little details - bark on a tree, texture of old bricks, smooth rocks on the lakeshore. These can be great and unique additions to your scrapbook.
With so much to see at our National Parks, it can be hard to get it all in. If you miss a photo of a place or a sign, you can often find them online by doing an image search. I often copy or download images from the web and use them in my books if I've missed a photo that I later realized I wanted for an album.
Most importantly, enjoy your trip to the national parks! They are amazing places and so much fun - take tons of pictures and experience all that you can - then when you get home you can make an amazing scrapbook!
Friday, February 5, 2016
What Progress Feels Like
We all know that feeling. That feeling you get when you look at a huge stack of photos that you have either just printed, or are way behind on, or have just been sitting in a box way to long. Those photos that have been sitting there, staring back at you, waiting for you to do something with them.
Sometimes that feeling is excitement. Excitement to start a new project, to work on something you've always wanted to do, or to finally tackle that album that you've always hoped to make. Excitement to get new supplies and a new album, knowing that you will create something amazing out of it all, but not yet knowing exactly what it will be.
But often that feeling can be dread. When will you get it done, how will you do it, when will you find the time? What if it doesn't turn out good? What if you don't finish?
Scrapbooking has taken me from days where I literally couldn't wait to work on a page, to months of not working on anything at all. But when you finally do get down to work, and find the right photos with the right supplies at the right time in your life, something amazing can happen. Happiness. Joy. Accomplishment.
I've recently completed a fairly large-scale project, and am close to finishing a second. We took a vacation last August to Glacier National Park and Yellowstone National Park, and since we drove out we stopped at 3 other national monuments and parks along the way. I took over 2,600 photos, of which I ended up printing 1,303 photos: 565 from Glacier, 559 from Yellowstone, and 179 from the rest of the road trip.
I knew scrapbooking this trip would take not only a lot of time, but a lot of supplies and a lot of creativity. I wanted these books to be different that what I've done in the past, and unique in their own way. I also wanted to use just one product line for each album - to have a more cohesive look and feel to the albums, but to each have their own unique look. I searched for a few months, even before our trip, for the right supplies. It was really difficult to find something that worked with the content of the photos and also the color scheme. I wanted it to be outdoorsy, but not woodsy, with an out-west vibe but not western themed.
I ended up choosing two product lines: We R Memory Keepers Indian Summer, and DCWV Weekend Neutrals. Indian Summer went with the Glacier pictures, and Weekend Neutrals went with the Yellowstone. I ordered supplies, bought albums, printed the photos, and could begin. That was 4 months ago.
I've finished the Glacier books and the Yellowstone books are about half way done. What began as 1 album per park quickly grew to 2 albums per park, but I didn't mind the extra layouts, since I was so happy with how the pages were coming out, and I had so many photos that I wanted to include. I've let the finished albums sit on the shelf now for a few weeks, then pulled them back out today to take a final look through, to see if I wanted to add or change anything. I added a couple of small embellishments here and there, but in the end I was happy with everything in the books. They are officially done!
The 2 12x12 3-ring albums hold 73 2-page layouts, including cover and back cover pages on both, for a total of 146 pages. The pages are packed with photos and mementos from our trip. It's an exciting feeling to be done, and to feel like I've created something that I know we will cherish and look through for years to come.
The 2 Glacier albums can be viewed here:
Glacier Album 1 - Many Glacier
Glacier Album 2 - Going-to-the-Sun Road
Please check them out - I hope you find will ideas to use in your next album!
What project are you most proud of? What projects do you still have to work on?
Sometimes that feeling is excitement. Excitement to start a new project, to work on something you've always wanted to do, or to finally tackle that album that you've always hoped to make. Excitement to get new supplies and a new album, knowing that you will create something amazing out of it all, but not yet knowing exactly what it will be.
But often that feeling can be dread. When will you get it done, how will you do it, when will you find the time? What if it doesn't turn out good? What if you don't finish?
Scrapbooking has taken me from days where I literally couldn't wait to work on a page, to months of not working on anything at all. But when you finally do get down to work, and find the right photos with the right supplies at the right time in your life, something amazing can happen. Happiness. Joy. Accomplishment.
I've recently completed a fairly large-scale project, and am close to finishing a second. We took a vacation last August to Glacier National Park and Yellowstone National Park, and since we drove out we stopped at 3 other national monuments and parks along the way. I took over 2,600 photos, of which I ended up printing 1,303 photos: 565 from Glacier, 559 from Yellowstone, and 179 from the rest of the road trip.
I knew scrapbooking this trip would take not only a lot of time, but a lot of supplies and a lot of creativity. I wanted these books to be different that what I've done in the past, and unique in their own way. I also wanted to use just one product line for each album - to have a more cohesive look and feel to the albums, but to each have their own unique look. I searched for a few months, even before our trip, for the right supplies. It was really difficult to find something that worked with the content of the photos and also the color scheme. I wanted it to be outdoorsy, but not woodsy, with an out-west vibe but not western themed.
I ended up choosing two product lines: We R Memory Keepers Indian Summer, and DCWV Weekend Neutrals. Indian Summer went with the Glacier pictures, and Weekend Neutrals went with the Yellowstone. I ordered supplies, bought albums, printed the photos, and could begin. That was 4 months ago.
I've finished the Glacier books and the Yellowstone books are about half way done. What began as 1 album per park quickly grew to 2 albums per park, but I didn't mind the extra layouts, since I was so happy with how the pages were coming out, and I had so many photos that I wanted to include. I've let the finished albums sit on the shelf now for a few weeks, then pulled them back out today to take a final look through, to see if I wanted to add or change anything. I added a couple of small embellishments here and there, but in the end I was happy with everything in the books. They are officially done!
The 2 12x12 3-ring albums hold 73 2-page layouts, including cover and back cover pages on both, for a total of 146 pages. The pages are packed with photos and mementos from our trip. It's an exciting feeling to be done, and to feel like I've created something that I know we will cherish and look through for years to come.
The 2 Glacier albums can be viewed here:
Glacier Album 1 - Many Glacier
Glacier Album 2 - Going-to-the-Sun Road
Please check them out - I hope you find will ideas to use in your next album!
What project are you most proud of? What projects do you still have to work on?
Thursday, February 4, 2016
Scrapbooking Disney Vacations
Scrapbooking a Disney vacation may just be one of the happiest things on earth. After the joy of your trip you get to practically relive it by spending hours looking at the pictures and journaling your memories! Since there are so many great photo opportunities at all of the Disney parks that I thought a post about Disney albums was much needed.
My first really large scale scrapbooking endeavor was scraping our 2010 Disney World Vacation. It ended up being 4 3-ring albums filled to the brim and took me over 3 years to complete. In the end I had 171 2-page layouts (including back and front covers for each book), for a total of 342 pages! I had 1 album for Magic Kingdom, 1 for Epcot, 1 for Animal Kingdom/Hollywood Studios, and 1 for travel, the hotel, and Downtown Disney.
When you’re at Disney, there is so much to see and do, but as a scrapbooker you always have to be looking for more – you have to be looking not only to capture those great memories, but be on the lookout for maps, brochures, times guides, and anything else you might want to add to your scrapbook once you get home.
- Park Icons - the Castle, the Tree of Life, Spaceship Earth - any main feature at the park.
- Ride Signs - before hopping in a ride, snap a photo of the sign.
- Pictures on the rides - I cannot stress enough how fun taking pictures on the rides is. I have literally captured my most favorite photos of my children’s faces while on the rides. In addition, I’ve taken some great shots ascending the roller coasters and during the rides themselves. Just pull your camera or phone, hold it up and snap away!
- Pictures from the queue lines or from around the ride. There are so many details in each of the rides, as you are standing in line take look around and photograph some of these small details.
- Character Photos - if you meet characters, be sure to get photos with them! The PhotoPass folks will take photos with your own camera as well as theirs.
- Food & Menus - Disney is known for great restaurants and food, so take a quick picture of your meal or of the restaurant menu. It'll make a fun addition to your scrapbook page.
- Fastpasses - before handing over your Fastpass, take a photo of it (for parks that still use the paper tickets.) These tickets will show the name of the ride, the date, and the time that you rode it!
- Disney Photos on Rides - after some rides there are screens that show photos of you on that ride. Some of these will link to your PhotoPass account, but some have to be purchased. Take a photo of your photo on the screen! Take multiple shots just incase you get some glare. I've done it many times and they've turned out great.
While you are at the park, you may want to collect certain mementos and keep an eye out for things to add to your album, such as:
These are just a few of the fun Disney ideas that you can add to your scrapbook. Things are always changing at Disney Parks and there may be many other great ideas of things to add to your scrapbook. Please comment below with any ideas you've used in your Disney albums!
For additional Disney page ideas, please see the Gallery for trip albums from Epcot, Animal Kingdom, and Hollywood Studios.
- Park Maps & Times Guides - pick up a couple of each, you may want to leave one intact in your scrapbook, and cut other parts out of an additional one. They are also good reference once you are home for names of rides, shows you saw, and restaurants you ate at.
- Park Tickets - be sure to save your park ticket or swipe card and put these in your book!
- Autographs - if you or your children collect autographs, collect them in the parks and when you get home take photos of them. Then print them out and you can add the autographs to your books!
- Kids Discovery Club booklet and stamps from Animal Kingdom. If your kids pick up the KDC booklets and compelete any of the activities, they can get a stamp in the booklet. Pick up a spare booklet for the scrapbook if your kids want to keep their own original booklet!
- Magical Express tickets and vouchers. If you use Disney Magical Express you should get a packet with your vouchers - these can be another nice addition to your book.
- World Showcase Stamps from EPCOT Passports - each country has a station where you can get a stamp in your books (or on a sheet of paper) and your name written in that countries language. Again, you can photograph these at home and add them to your books if you don't want to use the originals.
- Disney Animation Academy - participate in the academy drawing class and add your drawing to your book.
- Redwood Creek Trail Challenge at Disney California Adventure - pick up the map and complete the challenges! Save the map for your book - and get a sticker from the attendant upon completion.
These are just a few of the fun Disney ideas that you can add to your scrapbook. Things are always changing at Disney Parks and there may be many other great ideas of things to add to your scrapbook. Please comment below with any ideas you've used in your Disney albums!
For additional Disney page ideas, please see the Gallery for trip albums from Epcot, Animal Kingdom, and Hollywood Studios.
Tuesday, February 2, 2016
Setting Scrapbooking Goals
I was reading on a scrapbooking forum recently and saw a posting about Scrapbooking Goals for 2016. I've never really set goals for myself for scrapbooking, but was interested in what others did, so I read through the posting.
Some people set their goals based on the number of pages they wanted to get done, or getting through a backlog of old photos they needed to scrap. Others wanted to finish up trip albums, baby albums, or their photos from last year. A lot of people participated in different swaps and crops, and had goals to participate more in those.
After reading other scrappers goals, I was interested in maybe setting a couple of goals for myself. In my mind I always have goals for my scrapbooking and what I want to get done, but maybe putting it on paper was a good idea. Maybe it would help me work on a few things that I've let sit way too long. The first few goals were easy, then I had to start thinking a little bit:
The first 5 goals are what I'm currently working on and would normally do anyway. Then I tried to think of a few things that I've always wanted to go back and work on - mainly add some journaling to old albums. I tend to leave space in my albums to go back and journal, but I don't always do it or think to go do it...sometime I think I just avoid it. But I've been doing a lot more journaling lately so I feel more comfortable with the whole process and feel ready to add some journaling to those old albums. Lastly, I need to start planning what I'm going to do for our next trip and start thinking about supplies and albums.
I put my goal list on a bulletin board on my desk where I can see and reference it when needed. Hopefully throughout the year I'll be able to check things off as I complete them!
Do you set scrapbooking goals? What types and how many? Have you met your goals?
Some people set their goals based on the number of pages they wanted to get done, or getting through a backlog of old photos they needed to scrap. Others wanted to finish up trip albums, baby albums, or their photos from last year. A lot of people participated in different swaps and crops, and had goals to participate more in those.
After reading other scrappers goals, I was interested in maybe setting a couple of goals for myself. In my mind I always have goals for my scrapbooking and what I want to get done, but maybe putting it on paper was a good idea. Maybe it would help me work on a few things that I've let sit way too long. The first few goals were easy, then I had to start thinking a little bit:
The first 5 goals are what I'm currently working on and would normally do anyway. Then I tried to think of a few things that I've always wanted to go back and work on - mainly add some journaling to old albums. I tend to leave space in my albums to go back and journal, but I don't always do it or think to go do it...sometime I think I just avoid it. But I've been doing a lot more journaling lately so I feel more comfortable with the whole process and feel ready to add some journaling to those old albums. Lastly, I need to start planning what I'm going to do for our next trip and start thinking about supplies and albums.
I put my goal list on a bulletin board on my desk where I can see and reference it when needed. Hopefully throughout the year I'll be able to check things off as I complete them!
Do you set scrapbooking goals? What types and how many? Have you met your goals?
Wednesday, January 27, 2016
Organization on the Cheap: Ribbon
Organizing your scrapbook supplies can sometimes be a tedious task. But it is an important one! Having your supplies organized can help speed up the scrapbooking process when you can quickly find what you need and match things up easier. It can also save you some money by not purchasing things you already have stashed somewhere!
Today I needed to organize my ribbon. I don't usually use a lot of ribbon, but from time to time I will add it to a page or make it a consistent feature in an album. But my ribbon box has been a mess for YEARS. And having this mess has actually made me use less ribbon on my projects, since it was so unorganized and I had no idea what I had. I didn't even want to look in that box for anything!
I really didn't want to spend any money to do this, and organization units and racks can get really expensive. Since I don't use a lot of ribbon, it wasn't worth investing in a ribbon rack, so I needed to come up with something on my own. All it took was my $2 photo box, a few pencils, and a few sheets of cardboard! I was happy to find that unsharpened pencils are the perfect length to fit into the photo box and would be the perfect thing to string the rolls of ribbon on.
I began by pulling out all of the rolled ribbon, and put them on the pencil dowels. This did not work as perfectly as I thought it would, due to lots of unraveling of the ribbon. I could have taped down the ribbon to the rolls, but chose not to - again since my use of ribbon is so limited. If you use a lot of ribbon and are in and out of the box all of the time, you may want to tape down the ends and save yourself lots of re-rolling!
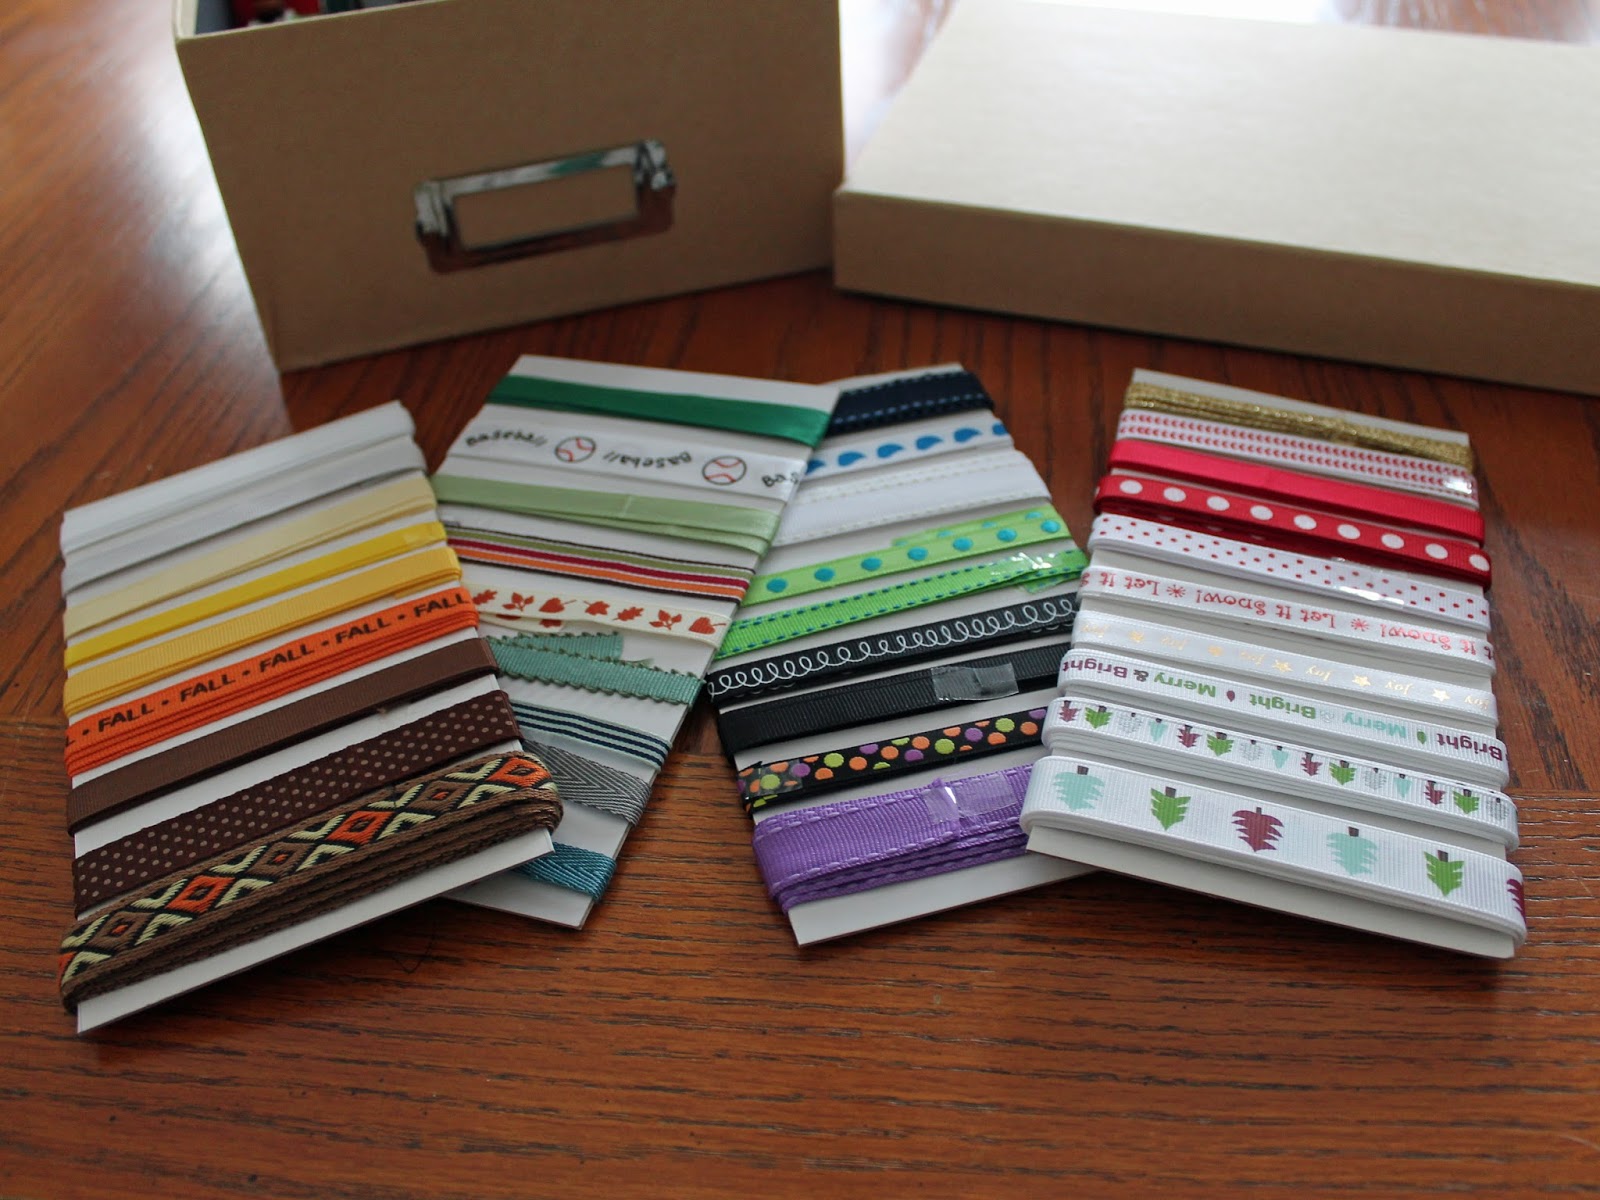
Once I had the rolled ribbon all on the pencils, I needed to decide what to do with all of the unrolled ribbon. I decided wrapping it on cardboard cards could work. I cut out 3 pieces of cardboard to fit the size of the box, and began wrapping the ribbon the on cards. I did have to tape down the ends on these to prevent unraveling, but it was quick and easy and definitely worth the time to do.
I was very happy with how the wrapped cards came out! I ended up needing to a fourth card to fit all of the ribbon, and did end up discarding a few small bits of ribbon that were too short to wrap or were just scrap pieces from used up rolls that I no longer needed. I tried to match up the ribbons on the cards by theme or color pallet, which worked out pretty well. If you have a lot of ribbon you could easily do one card per theme or color.
In the end, it only took me about 40 minutes to organize the ribbon box, and cost me nothing! Hopefully I'll be more inclined to pull out my ribbon box more often and use it. Happily, I only found one roll of duplicate ribbon in all of this!
Subscribe to:
Posts (Atom)