Showing posts with label organization. Show all posts

Thursday, January 28, 2016

Finding the Time to Scrapbook

I'm often asked "where do you find the time to scrapbook?" With everyone's busy lives these days, it can be really hard to find the time, or make the time, to do any craft or hobby. There was a lot years when my kids were younger that I was literally years behind on our photos, and back then I took a lot more photos than I do now...my kids were little and everything they did seemed like a big milestone that must go into a scrapbook! So I started to "bulk scrapbook" every few months. I tried to print my photos every 3-4 months as to not fall too far behind, and as soon as those photos would arrive I would pull out all of my supplies, commandeer the dining room table for a week or two and scrap them all - at least get everything on paper and in the books. I could always go back later and add embellishments, journaling, titles, etc. I just wanted the pictures in the books. While efficient and practical, sometimes it felt like an assembly line. I just didn't have the time to be super creative, spend hours on each page or keep my supplies out and accessible all of the time. But it got done and they turned out to be decent pages, although somewhat repetitive and predictable. When I was done I'd pack everything away and wait for the next batch of pictures in a few months.

I was very lucky though, my kids loved art and crafts! I could put my kids at the table with some leftover papers and stickers, let them cut up a photo I wasn't using, and we could spend the whole afternoon there. It got to be that the kids loved it when I pulled out scrapbooking stuff - they couldn't wait to "help" and make their own little creations. We spent a lot of hours at the table together while I worked on scrapbooking and they worked on their projects, or did playdoh, or built a puzzle. I also spent a lot of late nights at the table, long after everyone else was in bed, to finish up "just a few more pages." It was quiet time for me to do something that I enjoyed, and I was able to get a lot done with no distractions.

I no longer have to bulk scrapbook, and now that my kids are older I do have more time on my hands. But I still have to work hard to fit it in my schedule. If you are struggling to find time to scrapbook, try to break it up into smaller 15-30 minute increments. Scrapbooking doesn't have to be a long, exhaustive process. You can do it in small steps.  


1. Organize your supplies. One of the most time consuming things is constantly digging through supplies to find the thing you want to use - that one sheet of paper you just know you have somewhere or that one sheet of stickers you thought you bought last time at the hobby store. Bin systems are a great way to eliminate this - I use several 12x12 bins and have supplies sorted by theme. I have bins for: school, sports, travel, spring/summer, fall/Halloween, winter/Christmas, and kids/family. Embellishments and theme specific papers go in these. So when it's time for Christmas pictures, grab the one bin and have the bulk of what you'll need. I also have a "project bin" with pages waiting to be done - more on that below.

2. Organize your photos. Having your photos ready to go is just as important. When you get your photos, sort them into piles of what you will scrap together, and use some sort of a filing system to separate them. I use a photo box with dividers, as well as an old bill organizer on my desk.  The bill organizer holds all of the day-to-day photos, and I use the box for any large-scale projects like vacation pictures. Taking 15 minutes to sort and divide the photos when you get them home will allow you to just grab the stacks later when you are ready to scrap. The box or divider is also good for holding any personal mementos you want to add - tickets, brochures, etc, and put them with your pictures.


3. Reserve your supplies. If you know you have a holiday, birthday, or special event coming up and you have supplies you want to use - pull those supplies out and put them into a special folder. I keep a bin on my desk with kits and supplies "reserved" for upcoming events during the year. If I buy a kit that I want to use for my son's next soccer season, I label it with a post-it note and put it in the bin. This way it won't get used for anything else, and once I have those photos back, I can grab the kit and go, instead of rummaging though supplies looking for stuff to use. Sometimes I'll have things "reserved" for several months or a year in advance. (This also keeps me from buying supplies I don't need since I know in advance that I have Halloween or Christmas already covered for this year.)

4. Gather supplies and photos together, but don't scrap them yet. Some people call this "kitting" your own supplies. You're basically making your own scrapbook kit from your own supplies. Pick out the supplies that you want to use, pull the photos from the box or divider, and then set them aside. If you only have an extra 15 minutes, you can match up, or "kit together", what you want to use. Pull the papers and embellishments out, grab the photos, and put them in a "Project bin". You'll grab the bin later when you have more time to work on the actual layouts.


5. Use a Project Bin. Now that everything is together and ready to go, and when you have 30 minutes later that evening, or the next day or next week, you can just grab the bin and get to work. Although I have a desk, I like to scrapbook at the dining room table - it has more space and better lighting. But if I don't finish and need to clean up, everything goes right back into the project bin and I can finish it up when I get my next 15 minutes.

By breaking up the process, it becomes a lot less cumbersome and a lot more fun. Some days I can't seem match up anything, and other days I can match up 5 layouts in 15 minutes! Things just click like that sometimes. Some days you may not be in the mood to pull supplies, but you may want to make a layout you already have set to go in your project bin. If you have an extra 20 minutes before picking up the kids or heading off to work or an appointment - pull out your supplies or project bin and you can get a layout started or completed! 


Wednesday, January 27, 2016

Organization on the Cheap: Ribbon

Organizing your scrapbook supplies can sometimes be a tedious task. But it is an important one! Having your supplies organized can help speed up the scrapbooking process when you can quickly find what you need and match things up easier. It can also save you some money by not purchasing things you already have stashed somewhere!

Today I needed to organize my ribbon. I don't usually use a lot of ribbon, but from time to time I will add it to a page or make it a consistent feature in an album. But my ribbon box has been a mess for YEARS. And having this mess has actually made me use less ribbon on my projects, since it was so unorganized and I had no idea what I had. I didn't even want to look in that box for anything!

I really didn't want to spend any money to do this, and organization units and racks can get really expensive. Since I don't use a lot of ribbon, it wasn't worth investing in a ribbon rack, so I needed to come up with something on my own. All it took was my $2 photo box, a few pencils, and a few sheets of cardboard! I was happy to find that unsharpened pencils are the perfect length to fit into the photo box and would be the perfect thing to string the rolls of ribbon on.

I began by pulling out all of the rolled ribbon, and put them on the pencil dowels. This did not work as perfectly as I thought it would, due to lots of unraveling of the ribbon. I could have taped down the ribbon to the rolls, but chose not to - again since my use of ribbon is so limited. If you use a lot of ribbon and are in and out of the box all of the time, you may want to tape down the ends and save yourself lots of re-rolling!

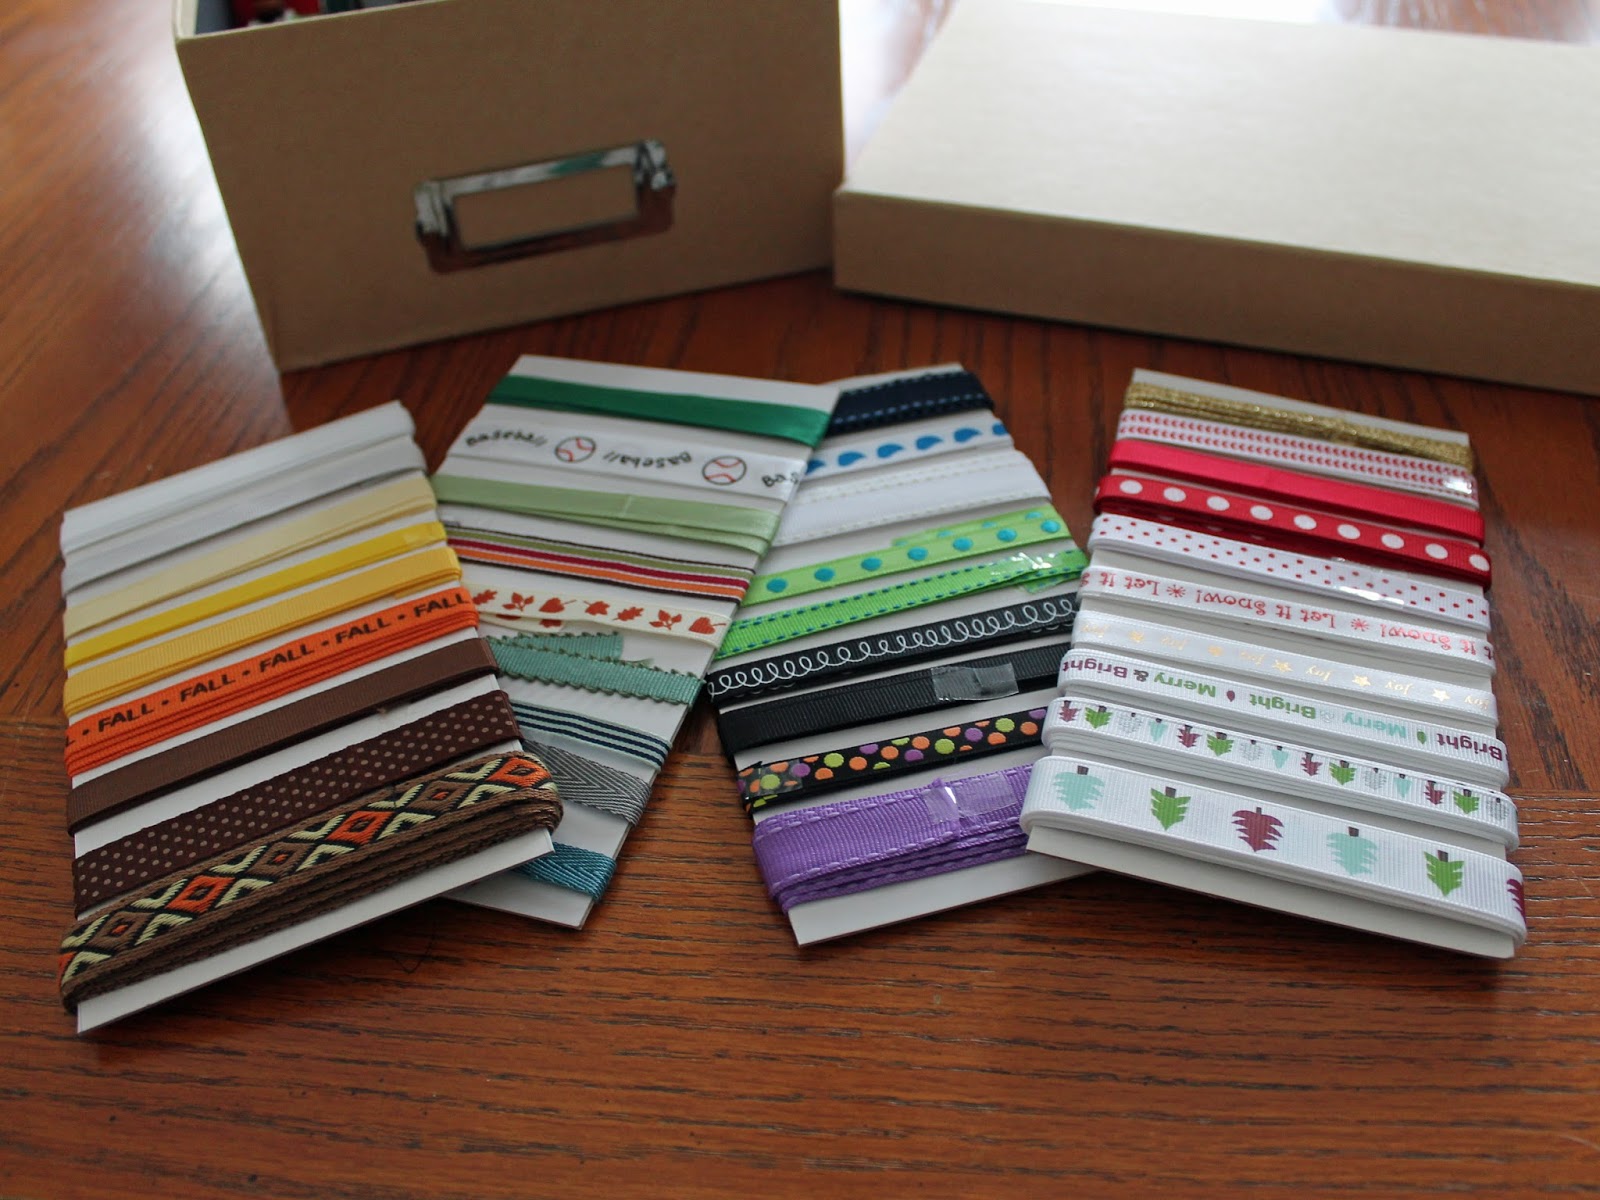
Once I had the rolled ribbon all on the pencils, I needed to decide what to do with all of the unrolled ribbon. I decided wrapping it on cardboard cards could work. I cut out 3 pieces of cardboard to fit the size of the box, and began wrapping the ribbon the on cards. I did have to tape down the ends on these to prevent unraveling, but it was quick and easy and definitely worth the time to do. 

I was very happy with how the wrapped cards came out! I ended up needing to a fourth card to fit all of the ribbon, and did end up discarding a few small bits of ribbon that were too short to wrap or were just scrap pieces from used up rolls that I no longer needed. I tried to match up the ribbons on the cards by theme or color pallet, which worked out pretty well. If you have a lot of ribbon you could easily do one card per theme or color.

In the end, it only took me about 40 minutes to organize the ribbon box, and cost me nothing! Hopefully I'll be more inclined to pull out my ribbon box more often and use it. Happily, I only found one roll of duplicate ribbon in all of this!